This step by step diy article is about how to build a cold frame. Building a cold frame would help you grow vegetables in the cold season, without spending money on energy. All you need to do is a miniature greenhouse, called cold frame. As you will see in the project, this project doesn’t require a significant investment nor complex woodworking skills, so any person can carry on the project successfully.
Nevertheless, there are a few aspects that you should take into account, before starting the actual construction project. As you probably imagine, you need to use quality materials, such as weather-resistant lumber (cedar, pine or redwood). From our experience, the best choice would be cedar siding, as the slats connect together and don’t let the cold air to get in the mini-greenhouse trough the gaps.
If you really want a versatile and an efficient small cold frame for your garden, we recommend you to split the lid in half. In this manner, you can have a between access to the interior, without opening the whole lid. Use poly-carbonate sheets to cover the cold house, as they are both transparent and less prone to break, as compared to regular glass. Secure all the components together with great care, for a professional result. See all my Premium Plans in the Shop.
Made from this plan
In order to build a cold frame, you need to use the following:
Materials
- A – 3 pieces of 1×6 lumber – 48″ FRONT AND BACK SLATS
- B – 4 piece of 1×6 lumber – 22 1/2″ SIDE SLATS
- C – 2 piece of 2×2 lumber – 5 1/2″, 2 pieces of 2×2 lumber – 11″ CORNER POSTS
- D – 1 piece of 1×4 – 48″, 1 piece of 2×2 – 30” long (one end cut at 15º, one at 75º) SUPPORTS
- E – 4 pieces of 1×2 lumber – 21″, 4 pieces of 1×2 lumber – 21 1/4″ LID
- 3 pieces of 1×6 lumber – 8 ft
- 1 piece of 2×2 lumber – 8 ft
- 1 piece of 1×4 lumber – 4 ft
- 2 pieces of 1×2 lumber – 8 ft
- hinges
- 2 1/2″ screws
- 1 1/4″ screws
- glue, stain
- wood filler
Tools
- Safety gloves, glasses
- Miter saw, jigsaw
- Chalk line, tape measure, spirit level, carpentry pencil
- Drill machinery and drill bits
Tips
- Pre-drill holes in the wooden components, before driving in the screws
- Apply several coats of paint to the wooden components
Time
- One Day
Related
Building a cold frame
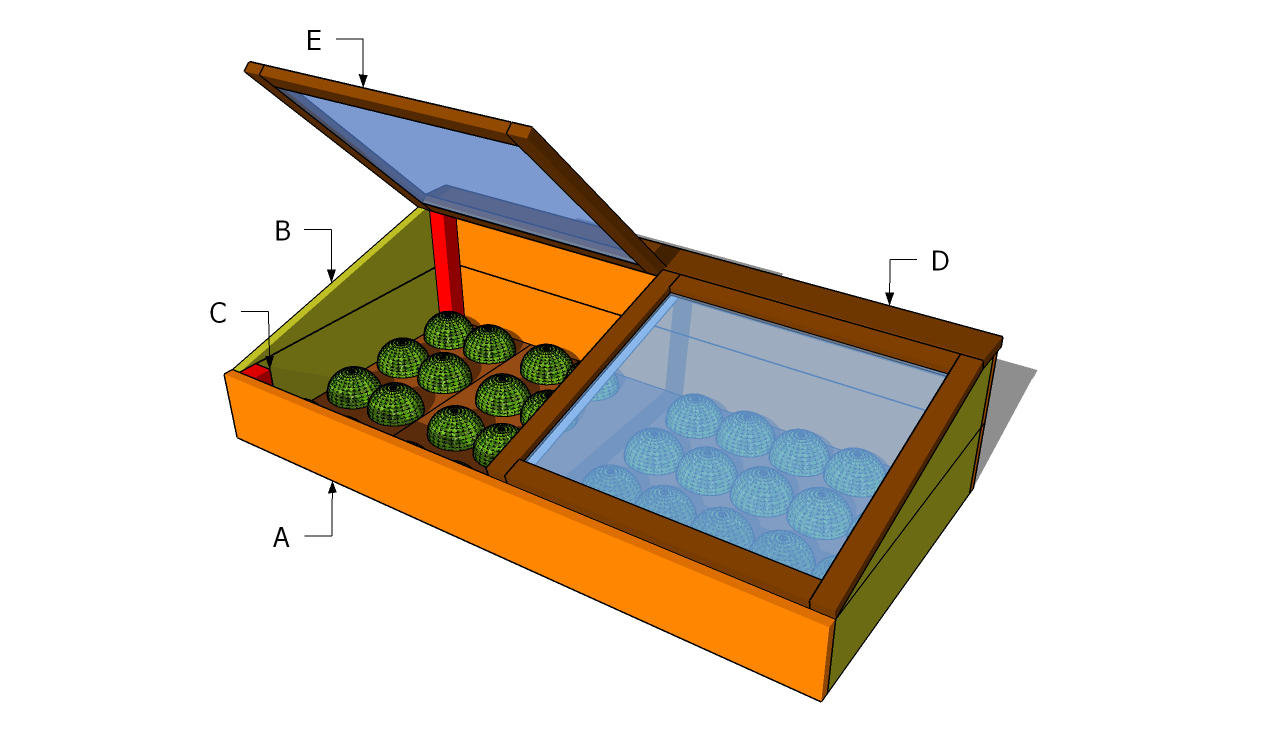
Building a cold frame
Smart Tip: Building a small cold frame is a good start if you want to grow vegetables in the cold season. As you can see in the image, any person get the project done, as it requires basic woodworking skills and common materials.
How to build a cold frame
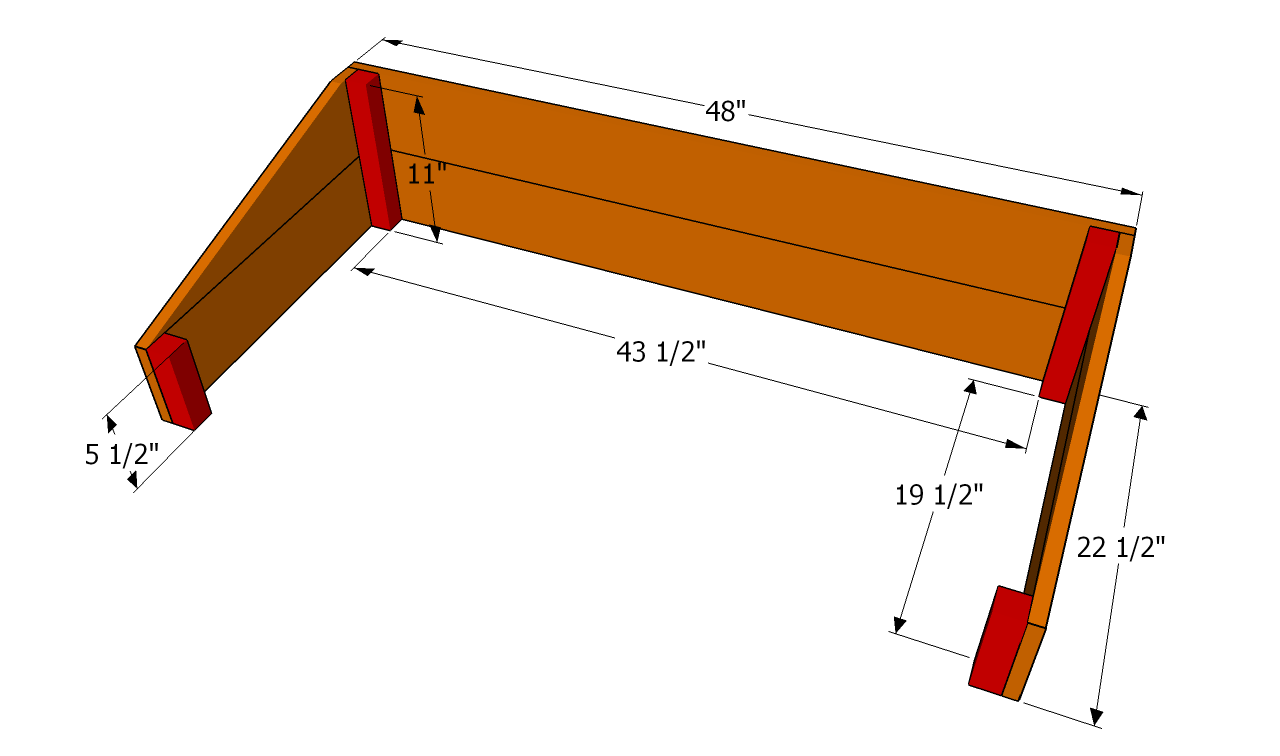
Building the frame
The first step of the project is to build the frame. As you can see in the image, you just need to attach 1×6 slats to 2×2 corner posts. In order to get the job done as a professional, we recommend you to drill pilot holes trough the slats before inserting the 2 1/2” galvanized screws, to prevent the wood from splitting.
Check if the corners are square and the diagonals equal. Countersink the head of the screws.

Side view
As you can see in the image, you need to cut the side slats at 15 degrees. Mark the cut line on the slats and get the job done with a circular saw. Secure the top slats to the corner posts at one end and to the bottom slats at the other one.
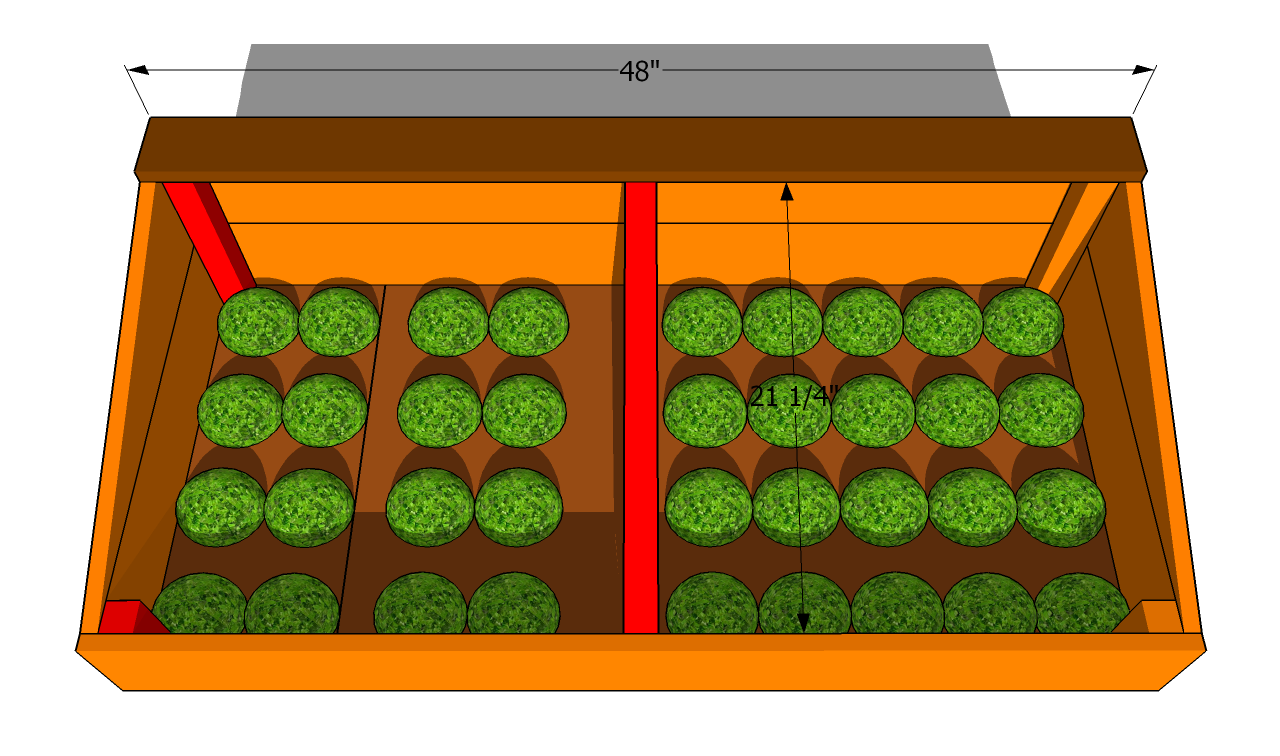
Installing the supports
In order to get a rigid frame, we recommend you to attach a 1×4 support slats on top of the cold frame, as in the plans. Secure the support to the framing with 2 1/2” wood screws.
Smart Tip: In addition, fit a 2×2 support between the front and the back faces of the cold frame, as in the image. This component will provide support the cold frame and hold it locked together tightly. Align the components at both ends.
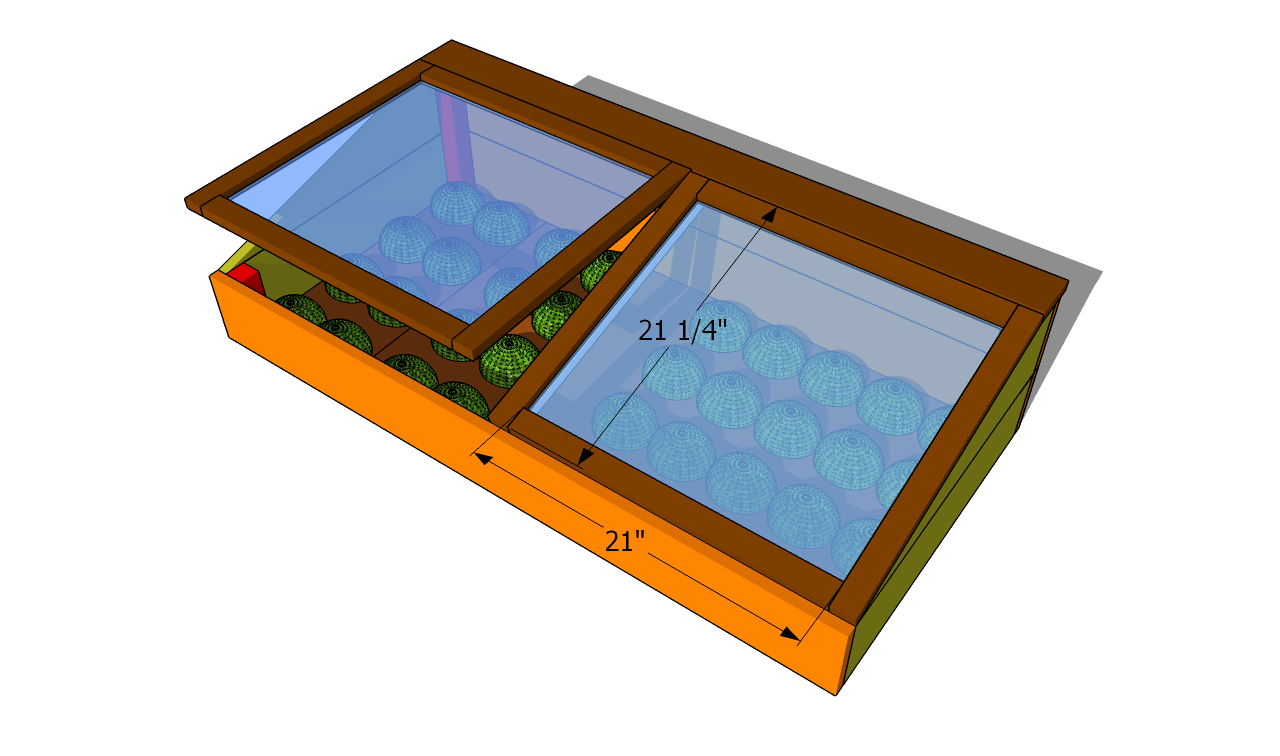
Installing the lid
Continue the woodworking project by fitting the lids to the frame, as you can easily notice in the image. You can get the job done easily by using 1×2 lumber. Secure the components together with screws, after checking is the corners are square.
Attach poly-carbonate sheets to the lids. Secure the lids to the back support with several hinges. Align the lids properly, before driving in the wood screws.
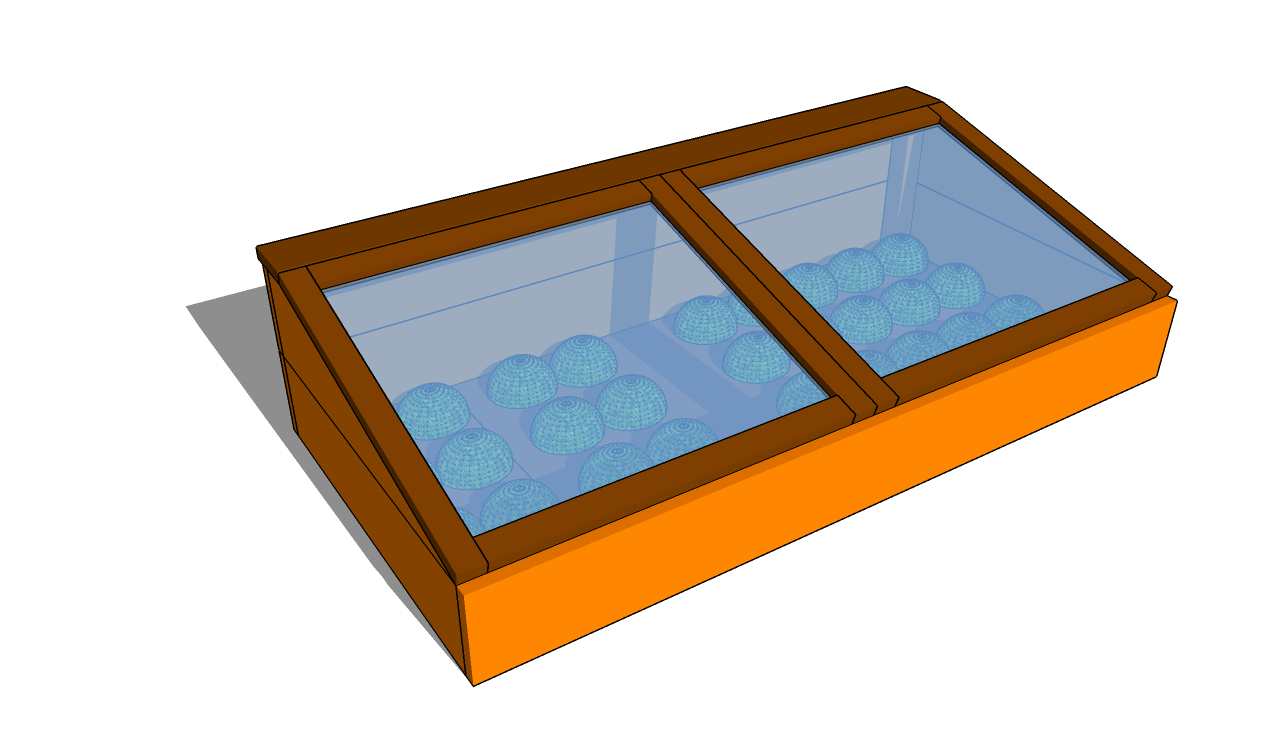
How to build a cold frame
The last step of this garden project is to take care of the finishing touches. In order o get a professional result, you should check if all the components are secure into place properly. In addition, drive in the screws properly and make sire their head is level with the wooden surface.
Smart Tip: Apply several coats of paint to the wooden components, in order to protect them from rot and to enhance the look of the cold frame. Don’t forget to also take a look over these plans, if you want to learn how to build an elevated cold frame with lots of storage for pots and soil bags. If you want to download the plans. just click on the GET PDF PLANS button bellow.
Thank you for reading our article about how to build a cold frame and we recommend you to check out the rest of our projects. Don’t forget to share our projects with your friends, by using the social media widgets.
