
This step by step woodworking project is about free compost bin plans. I have designed this wood compost bin so any person with minimum woodworking skills can get the job done quickly and without a significant investment. This compost comes with a two part top lid and with a nice front door, so you can have access to the interior at any given time.
This compost is the ideal solution if you have a greenhouse and you want to fertilize the plants organically. If you place the wooden bin to one corner of your property and you mix it properly, the compost will not smell and it will be very helpful for your tiny plants in the greenhouse. If you need more space for the residues, then you can build a few bins. See all my Premium Plans in the Shop.
Made from this plan
Free Compost Bin Plans
Building a compost bin
Materials
- A – 8 pieces of 1×4 lumber – 31 1/2″ long BASE
- B – 12 pieces of 1×6 lumber – 30″ long SLATS
- D – 12 pieces of 1×6 lumber – 29 1/4″ long SLATS
- E – 2 pieces of 2×2 lumber – 31 1/2″ long CLEATS
- F – 2 pieces of 1×4 lumber – 14″ long, 4 pieces – 30 3/4″ long 2xLID
- 2 1/2″ screws, 1 5/8″ screws
- hinges
- 8 pieces of 1×4 lumber – 8′
- 7 pieces of 1×6 lumber – 8′
- 1 piece of 2×2 lumber – 8′
Tools
- Safety gloves, glasses
- Miter saw, jigsaw
- Chalk line, tape measure, spirit level, carpentry pencil
- Drill machinery and drill bits
Time
- One Week
How to build a compost bin – Step by Step Plans
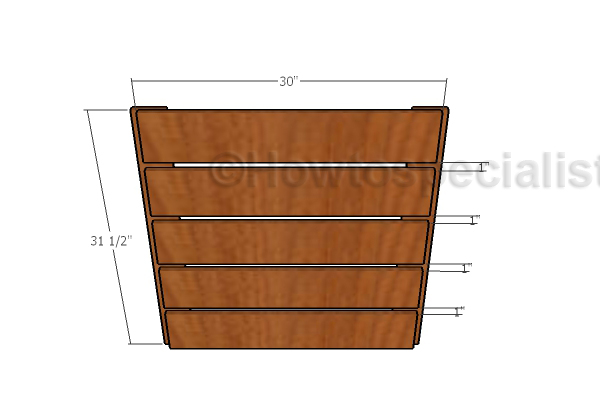
Building the back wall
The first step of the project is to build the back wall for the compost bin. As you can easily notice in the plans, you need to use 1×4 lumber for the vertical posts and 1×6 lumber for the horizontal slats. Place a piece of 1″ lumber between the slats so you create even gaps. Drill pilot holes at both ends of the 1x6s and secure them to the posts with 1 1/4″ screws.
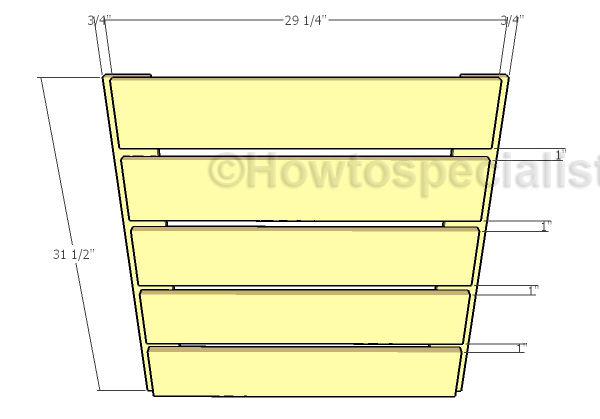
Building the sides
Build the sides for the compost bin in the same manner described above. Make sure you offset the vertical supports 3/4″ on both ends of the horizontal slats. Drill pilot holes and insert 1 1/4″ screws.
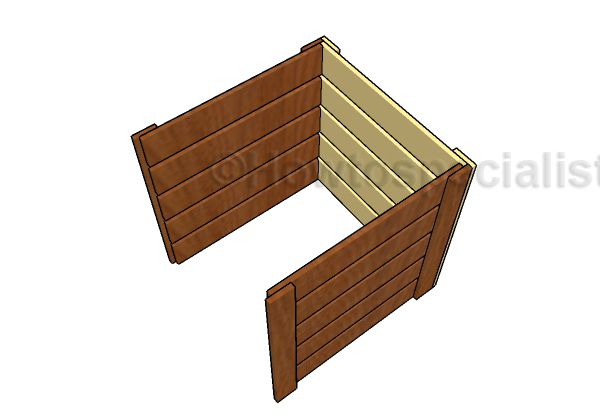
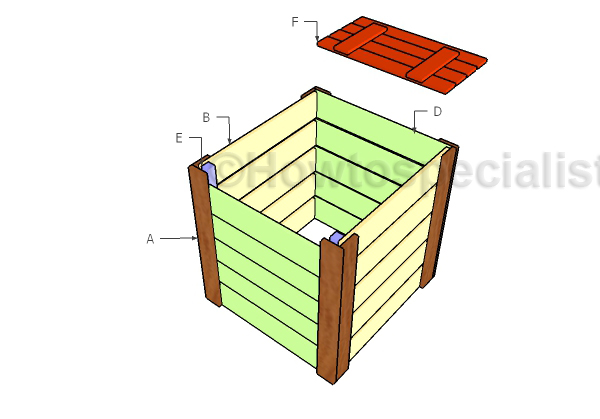
Assembling the frame of the compost bin
Assemble the frame of the component bin using the information from the diagram. Drill pilot holes and insert 1 1/4″ screws to lock the adjacent walls together tightly.
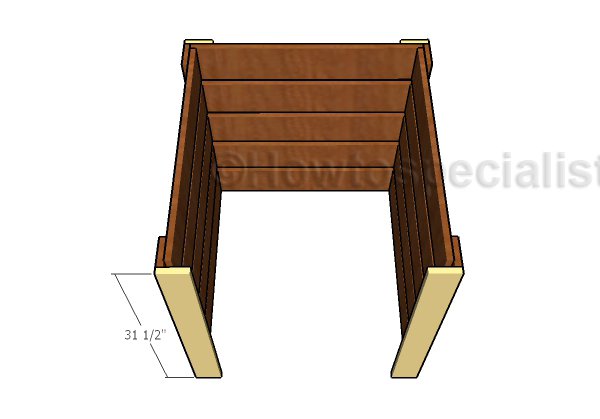
Fitting the front cleats
Fit 1×4 supports to the front of the compost bin. Align the edges flush and secure them into place with 1 1/4″ screws.
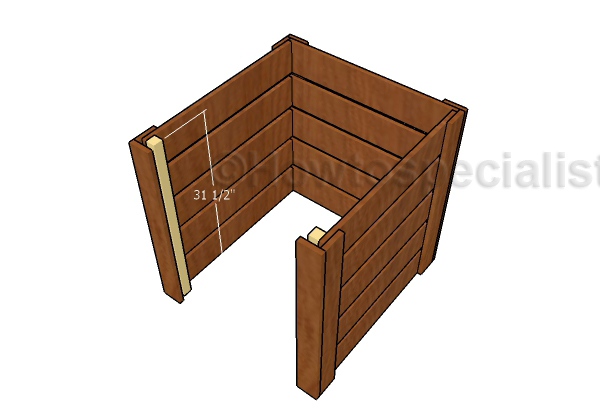
Fitting the cleats
Install 2×2 cleats to the interior of the compost bin, so you can install the front door to the compost lid.
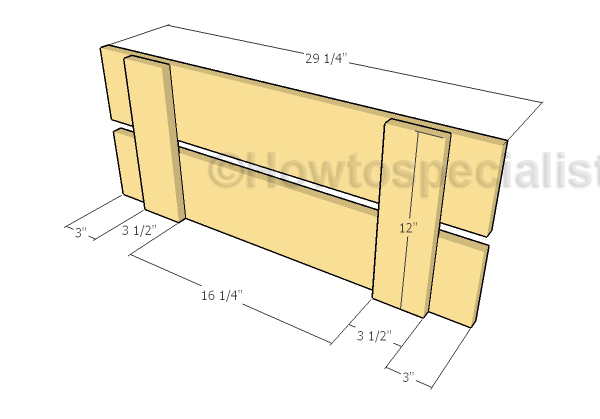
Front door
Build a small front door for the compost bin, as shown in the plans. Slide the door to the cleats placed at the front of the compost bin.

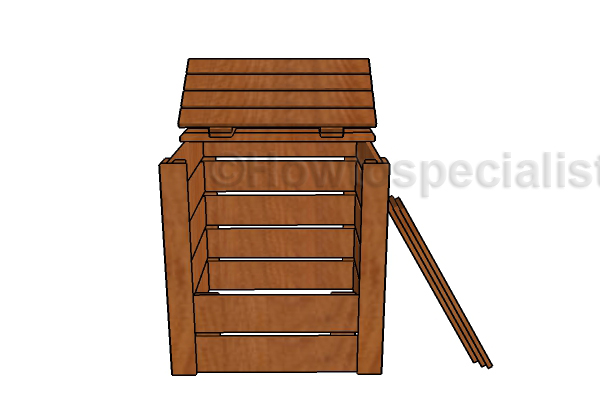
Front wall slats
Slide a few more 1×6 boards to the front of the compost bin, so you can fill it all with vegetable residues. In addition, when you have to mix the compost, you can easily remove the front boards and have a super easy access.
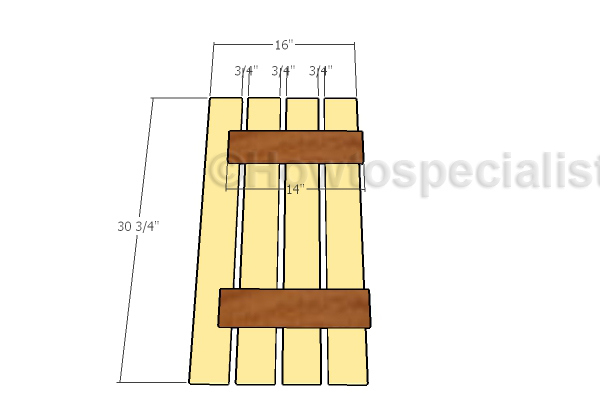
Building the lid
Build the top lid for the compost bin from 1×4 lumber. Assemble the lid tightly.
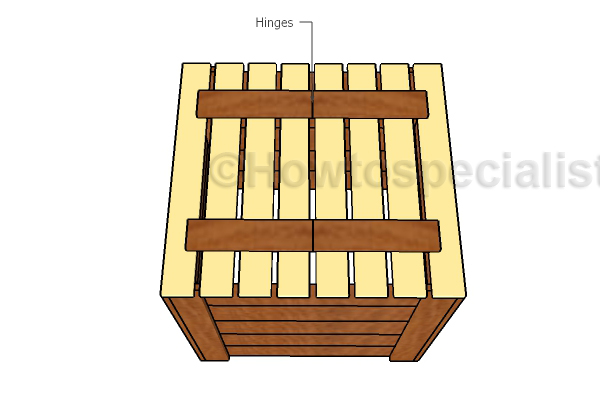
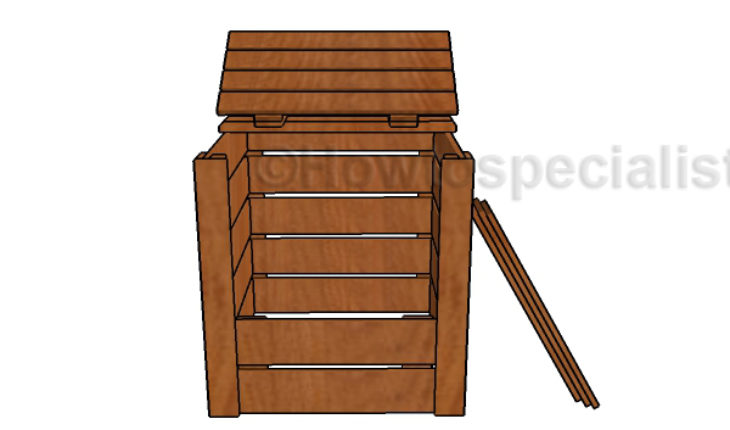
Fitting the lid
Fit the lid to the top of the compost bin, so you protect the compost from heavy rain and other precipitations.
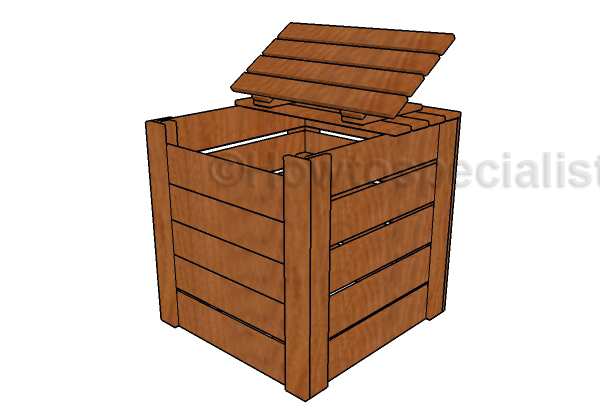
DIY Compost Bin Plans
As you can easily notice in my free plans, the wood compost bin is large enough for the needs of a small family. Make sure you also consider building a greenhouse so you can integrate everything properly, from compost to the end fruit.
You can use 1×2 stakes to lock the side walls of the compost bin into place. Use 1 1/4″ screws to lock the stakes to the compost bin.
Compost bin plans
Last but not least, we recommend you to take care of the finishing touches. In order to get a professional result, fill the holes and the gaps with wood filler and let it dry out for a few hours. Check if there are protruding screws and fix the issue if necessary.
Thank you for reading our project about free compost plans and we recommend you to check out the rest of the projects. Don’t forget to LIKE and SHARE our projects with your friends, by using the social media widgets.

