
This step by step diy article is about playhouse loft bed plans. Building a playhouse loft bed is a complex project, but it will most certainly put a big smile on your kid’s face. Although there are many designs you could choose from, in this article we will show you all you have to know about making a beautiful loft bed out of common materials. If you have worked with lumber before, the carpentry techniques should be familiar to you.
Buy quality lumber, made for building lumber, if you want to get a durable bed. Nevertheless, you could save some money if you purchase lumber with knots, which could even enhance the look of project, giving it a rustic appearance. Select the slats with great attention, checking if they are in a good condition (the lumber has to be straight and without chips, dents or cracks).
Always aligned the components before locking them together with screws. In addition, we recommend you to pre-drill the lumber, otherwise the wood might easily split. Add glue to the joints, if you want to enhance their bond. Smooth the components with fine-grit sandpaper and apply a few coats of paint, in order to enhance the look of the playhouse bed frame. See all my Premium Plans in the Shop.
Made from this plan
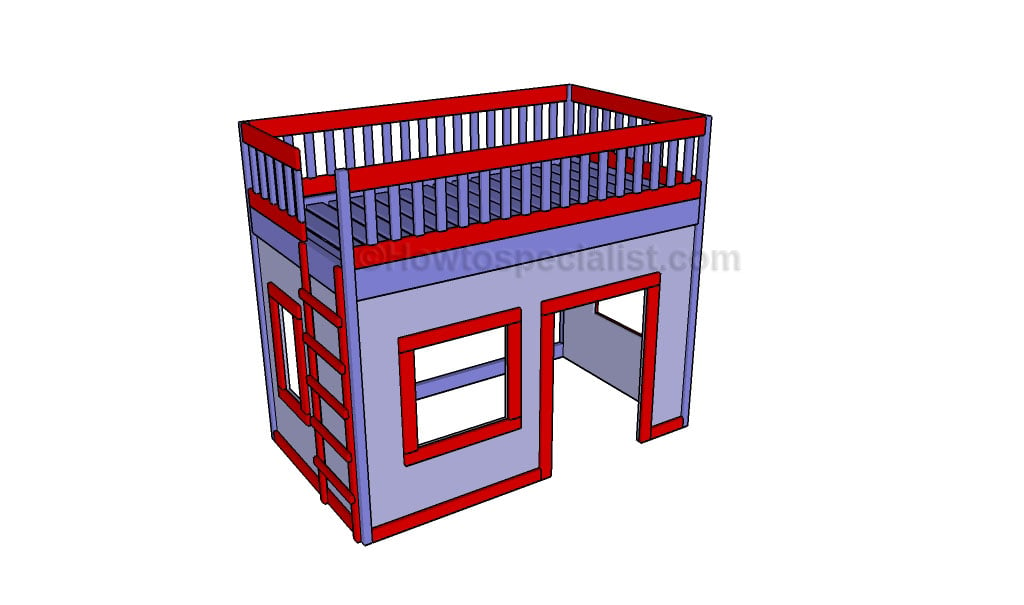
Playhouse loft bed plans

Building a playhouse loft bed
Materials
- A – 4 pieces of 2×2 lumber – 69” long LEGS
- B – 2 pieces of 2×6 lumber – 43″ long, 2 pieces – 76″ long FRAME
- C – 3 pieces of 2×4 lumber – 76” long CLEATS
- D – 16 piece of 1×4 lumber – 40” long SLATS
- E – 2 pieces of 3/4″ plywood – 43’x47 1/4″ long, 1 piece – 52 3/4″x76″ long PANELS
- F – 2 pieces of 1×3 lumber – 20” long, 2 pieces – 25″ long, 2 piece – 36″ long, 1 piece – 29″ long, 1 piece – 37 1/2″ long, 1 piece – 9 1/2″ long FRONT TRIMS
- F – 1 piece of 1×3 lumber – 43″ long, 2 pieces – 20″ long, 2 pieces – 15″ long SIDE BACK WALL
- F – 1 piece of 1×3 lumber – 43″ long, 2 pieces – 20″ long, 2 pieces – 24″ long SIDE FRONT WALL
- G – 4 pieces of 1×4 lumber – 76″ long, 2 pieces – 43″ long, 2 pieces – 26 3/4″ long RAILS
- H – 50 pieces of 1×2 lumber – 9 1/4″ long BALUSTERS
- I – 2 pieces of 1×2 lumber – 52 3/4″ long, 5 pieces – 16 1/4″ long LADDER
Tools
- Safety gloves, glasses
- Miter saw, jigsaw
- Chalk line, tape measure, spirit level, carpentry pencil
- Drill machinery and drill bits
Tips
- Pre-drill holes in the wooden components, before driving in the screws
- Smooth the exposed edges, by using a router with a 1/4” bit
Time
- One day
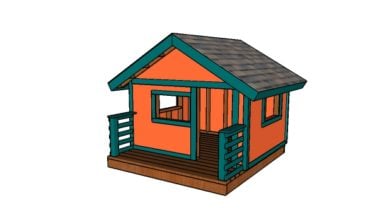
Related
Building a loft bed

Building the bed frame
The first step of the project is to build the frame of the bed. As you can easily notice in the plans, we recommend you to cut the components out of 2×6 lumber. Drill pocket holes at both ends of the long components and insert 2 1/2″ screws into the perpendicular components. Check if the corners are square and add glue to the joints.

Fitting the cleats
Cut the cleats out of 2×4 lumber and attach them to the frame using 2 1/2″ screws. Leave no gaps between the components and add glue to enhance the bond of the structure.

Fitting the support slats
Cut the support slats out of 1×4 lumber, making sure you select quality slats. Place the slats on the cleats, equally-spaced, and lock them into place using 1 1/4″ screws. Check if the surface is perfectly horizontal before continuing the assembly of the playhouse loft bed.

Attaching the legs
Attach the bed frame to the legs, as described in the diagram. Plumb the legs with a spirit level and make sure the corners are right-angled before inserting the bolts through the legs into the bed frame. Drill pilot holes through the legs and through the bed frame before inserting the bolts, in order to prevent the wood from splitting.

Fitting the front face
Cut the front face out of 3/4″ plywood using the information displayed in the diagram. Use a circular saw to make the cuts and smooth the edges with sandpaper. Drill a starting holes and cut out the window by using a jigsaw. Drill pocket holes along the plywood piece and secure it to the frame by using 1 1/4′ screws. Leave 3/4″ from the front face of the legs to the plywood walls.

Fitting the trims to the face wall
Cut the trims out of 1×3 lumber and attach them to the front wall by using finishing nails and waterproof glue. Make sure you align the components with attention and leave no gaps between them.

Building the frame of the loft bed
Continue the project by fitting the 2×4 support to the opposite side of the loft bed, as described in the diagram. Drill pocket holes at both ends of the support and lock it to the legs by using 2 1/2′ screws. Make sure the corners are right-angled and the legs are plumb, before inserting the galvanized screws.

Fitting the back wall
Build the back side wall out of 3/4″ plywood. Make sure you pay attention to the diagram before making the cuts. Smooth the cut edges and drill pocket holes along the sides and the top of the plywood piece. Fit the wall between the legs and secure it into place using 1 1/2′ screws. Leave 3/4″ from the front face of the legs to the plywood walls.

Fitting the trims to the back wall
Attach the 1×3 trims to the plywood wall. Secure the trim into place by using finishing nails and waterproof glue. Smooth the edges with sandpaper and remove the residues before applying the coats of paint.

Fitting the end wall
Repeat the process for the opposite side wall. Make sure you secure the plywood piece into place tightly, otherwise the end result won’t raise up to your expectations.

Fitting the trims to the end wall
Attach the 1×3 trims to the plywood piece by using waterproof glue and finishing nails. Make sure corners are right angled and leave no gaps between the components.

Fitting the face guard rails
Building the guard rails is a straight-forward process, but you need to pay attention to a few thing before starting the actual assembly process. Cut the horizontal components out of 1×4 lumber and drill pocket holes at both ends. Secure the supports to the legs by using 1 1/4′ screws. Build the vertical supports out of 1×2 lumber and drill pocket holes at both ends. Place the supports equally-spaced and lock them to the frame using 1 1/4′ screws.

Fitting the end guard rails
Build the side rails using the same techniques described above. Make sure you secure the support components to the legs and to the bed frame. Use a spirit level to check if the rails are horizontal and drill pocket holes before inserting the screws, to prevent the wood from splitting.

Building the back rails
On the opposite side of the loft bed you need to leave enough space for the ladder. Work with attention and invest in high quality materials. Plumb the guard rail before inserting the screws, add glue to the joints and make sure the structure is rigid.

Fitting the ladder supports
Attach the 1×2 ladder supports to the back of the loft bed, as described in the diagram. Work with attention and plumb the supports before locking them into place with 1 1/4″ screws.

Fitting the steps
Attach the 1×2 steps to the ladder supports. Take accurate measurements and place the steps equally-spaced. Secure the steps to the supports by using 1 1/4″ screws. Add glue and make sure the steps are perfectly horizontal.

Playhouse loft bed plans
Last but not least, you need to take care of the final touches. Therefore, you need fill all the holes with a good filler and let the compound to dry out properly, before sanding the wooden surface with 120-grit sandpaper.
Thank you for reading our article about playhouse loft bed plans and we recommend you to check out the rest of our home improvement projects. Don’t forget to LIKE and SHARE this projects to your friends, using the social media widgets, if you’ve found it useful.

