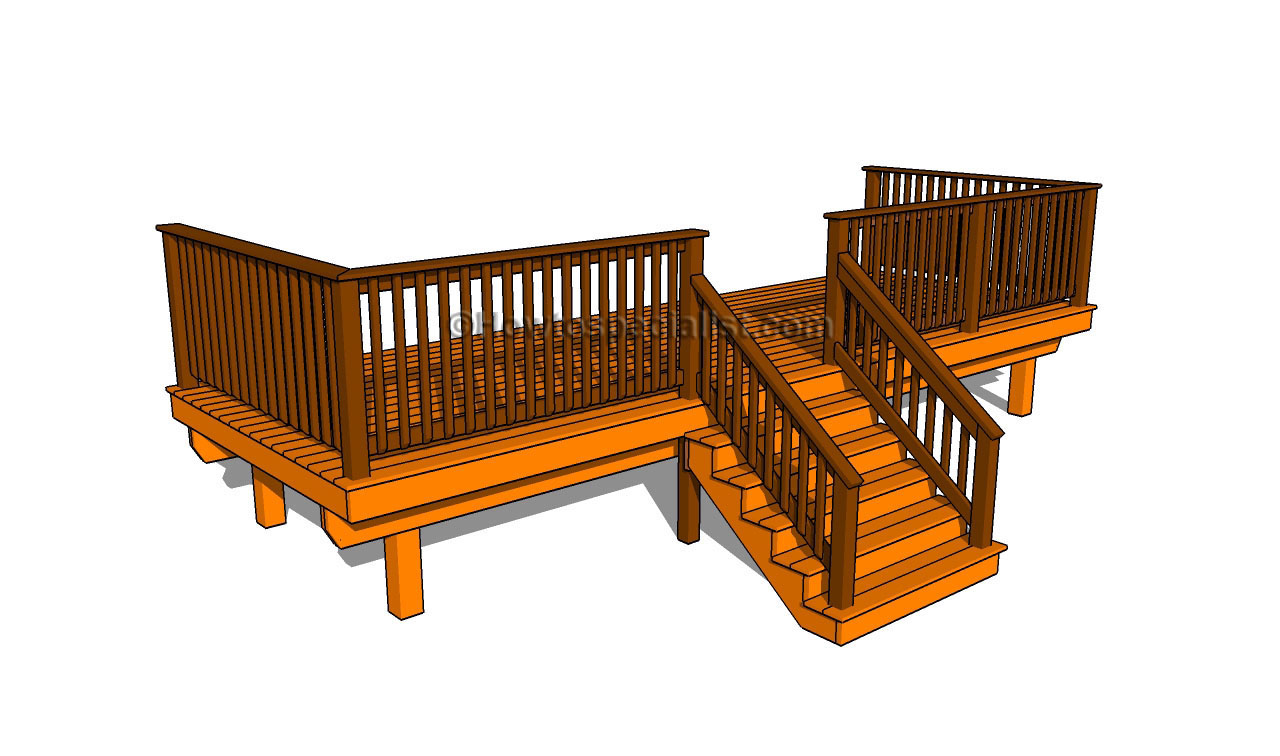
This step by step diy project is about how to build porch railing. Building porch railing is a complex project, but anyone with basic skills can get the job done. Work with attention and with great care before starting the actual construction project. Take a look over the rest of the deck projects, as there are many techniques and tricks that you could learn or just get an idea of the steps required.
After you make the frame of the front porch, we recommend you to attach the railing. As you will see in this detailed tutorial, making the railing is an easy job, if you take accurate measurements and you use professional tools. Make sure you cut the bottom ends of the balusters at 45 degrees, as to enhance the look of the porch. In addition, pay attention to the handrail joints.
As we always emphasize, you should adjust the size of the porch to your needs. Therefore, you need to modify the size of the components to the appropriate dimensions, but you can still use the guidelines shown in this article. Don’t forget that you shouldn’t leave more 4″ between the balusters. Moreover, take a look over the local building codes, to get accustomed with the legal requirements.
Made from this plan
Building porch railing

Building porch railing
Materials
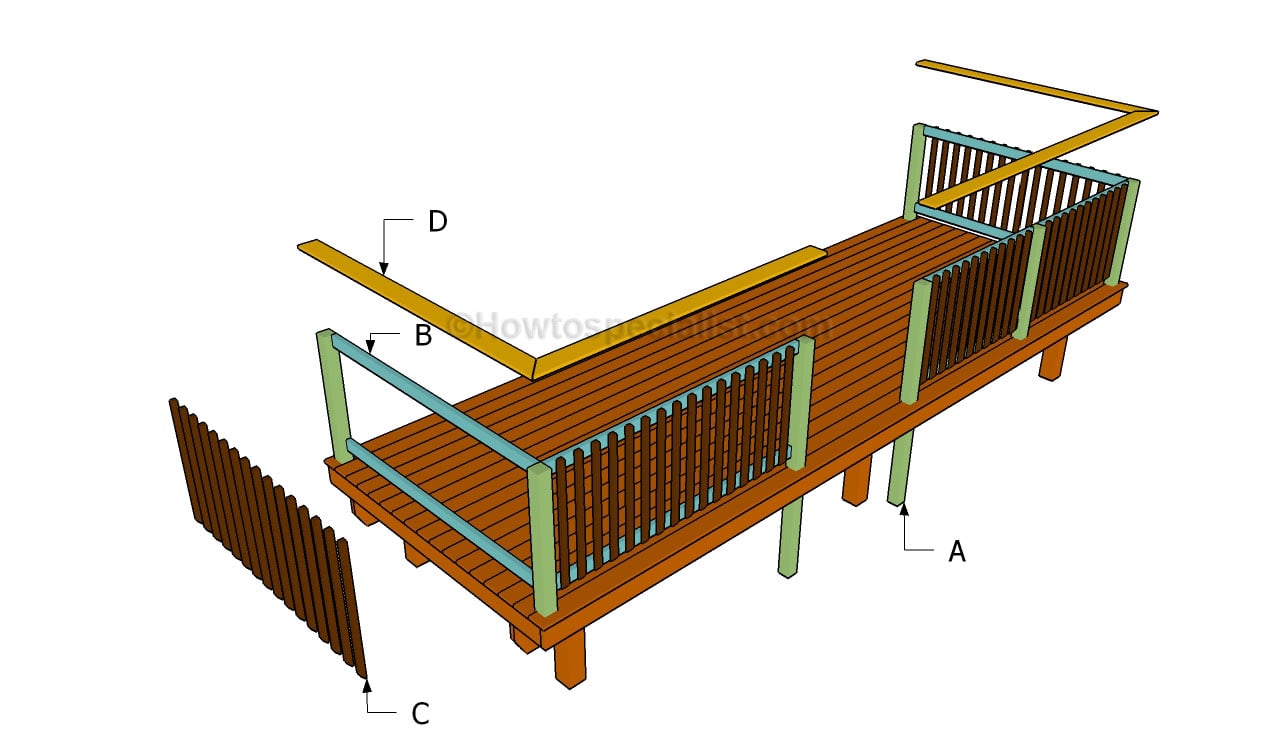
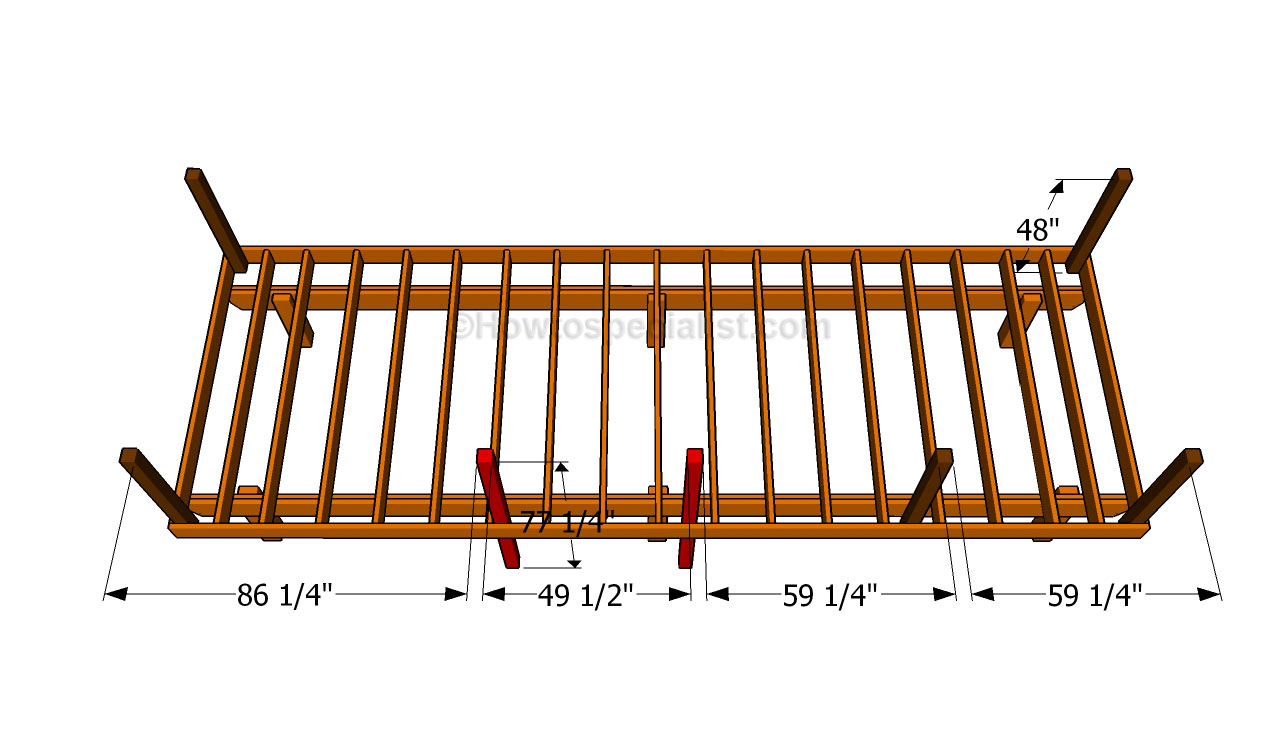
- A – 5 pieces of 4×4 lumber – 48” long, 2 pieces – 77 1/4″ long POSTS
- B – 4 pieces of 2×4 lumber – 59 1/4”, 4 pieces – 86″, 2 pieces – 86 1/4″ CLEATS
- C – 70 pieces of 2×2 lumber – 36″ long BALUSTERS
- D – 2 pieces of 2×6 lumber – 95 3/4” long, 1 piece – 95 1/2″, 1 piece – 131 1/2″ HANDRAILS
Tools
- Safety gloves, glasses
- Miter saw, jigsaw
- Chalk line, tape measure, spirit level, carpentry pencil
- Drill machinery and drill bits
Tips
- Apply several coats of wood stain to the wooden components
- Fill the holes with wood filler and smooth the surface
Time
- One Day
Related
- Part 1: How to build a front porch
- Part 2: How to build porch railing
- Part 3: How to build porch stairs
- Part 4: How to build porch stair railing
How to build porch railing
The first step of the backyard project is to install the posts into place. Therefore, we recommend you to secure the regular posts to the deck framing, while the center posts should be set into the ground for at least 3′. Dig the holes with a post digger, set the posts into place and fill the cavities with concrete.
The next step of the project is to install the 2×4 cleats that will support the balusters, between the wooden posts. Drill pocket holes at both ends of the cleats and lock them to the posts with galvanized screws. Leave about 3 1/2″ from the decking to the bottom cleat, and adjust everything to suit your needs. Add waterproof glue to the joints, if you want to create a rigid structure.
Continue the project in the same manner, by attaching the cleats to both sides of the porch. Building porch railing is not a complex project, but you need to pay attention to several aspects.
The next step of the project is to install the 2×2 balusters. If you want to enhance the look of the front porch, we recommend you to cut the bottom of the balusters at 45 degrees. Drill pilot holes trough the balusters before inserting the 2 1/2″ wood screws into the cleats.
Proceed in the same manner described above, on both sides of the porch, if you want to get the job done in a professional manner. Build the balusters from quality lumber, making sure the components are perfectly straight and in a good visual condition.
One of the last steps of the project is to attach the handrails. Therefore, use 2×4 lumber and create strong joints, as in the plans. Cut one end of the components at 45 degrees, otherwise they won’t lock together easily. Drill pilot holes trough the handrail before inserting the screws into the cleats. Don’t forget to countersink the head of the screws, otherwise you won’t get an even surface.
Last but not least, we recommend you to take care of the finishing touches. Fill the holes with wood filler and let it to dry out for several hours. Afterwards, smooth the wooden surface with fine-grit sandpaper and vacuum the residues. Take a look on the rest of the project is you want to learn how to build the frame and the stairs for the porch.
Thank you for reading our project about how to build porch railing and we recommend you to check out the rest of the projects. Don’t forget to share our projects with your friends, by using the social media widgets.


