
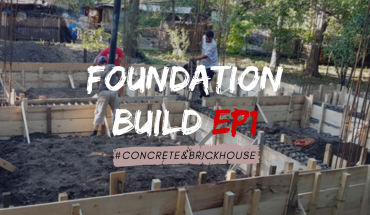
This article is about how to build a concrete and brick house. This is Episode 2 of the concrete and brick house series, where I show you how to build the walls, how to pour the concrete ceilings and how to build the interior stairs. This is going to be a very long article because I share lots of pictures during the build. I hope you find useful info on the subject and you can learn something for your own projects.
This brick house is built to withstand 8.5 earthquakes on Richter scale and thus, it has strong structure made with re-bars and concrete. We used brick blocks for the interior and exterior walls. We used 8 tons of rebars for this house and close to 100 cubic meters of concrete for the whole constructions. In Episode 1, I will show you the story of the land, the plans for the house and how we poured the foundation. See all my Premium Plans HERE.
Made from this plan
Materials
- Premixed concrete
- Lumber – to build the forms
- Nails and screws
- Reinforcing bars – to build the reinforcing structure
- Welded mesh
- Reinforcement Spacers
- XPS Polystyrene
- Plumbing pipes
- Foundation Sealer
Tools
- Safety gloves, glasses
- Measuring tape, carpentry pencil, l-square, spirit level
- Concrete mixer – to mix the concrete
- Hammer and circular saw – to build the formwork
- Float – to finish the concrete
- Concrete Pump & mixer
- Angle grinder
- Stirrups bender
Time
- 2 weeks
Related
- Episode 1: Building the foundation
- Episode 2: Building the walls
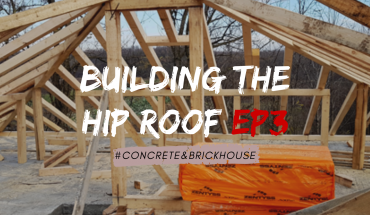
- Episode 3: Building the roof
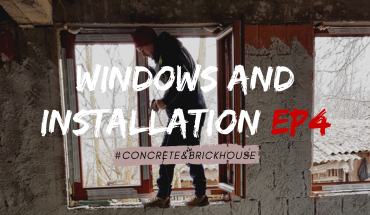
- Episode 4: Doing the installation and Windows
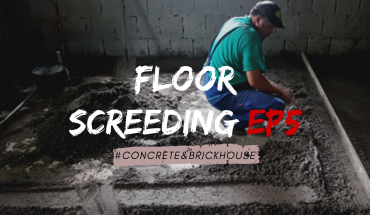
- Episode 5: Screeding the floors
- Episode 6: Installing the rock wool insulation
- Episode 7: Painting the house on the exterior
- Episode 8: Cementer render and wall plaster
- Episode 9: Installing natural stone
- Episode 10: Installing the septic Tank
- Episode 11: Building the walkarounds with pavers
- Episode 12: The kitchen
- Episode 13: The bathrooms
- Episode 14: The living Room
- Episode 15: The bedrooms
Brick House Construction – Video!
How to Build Brick Block Walls
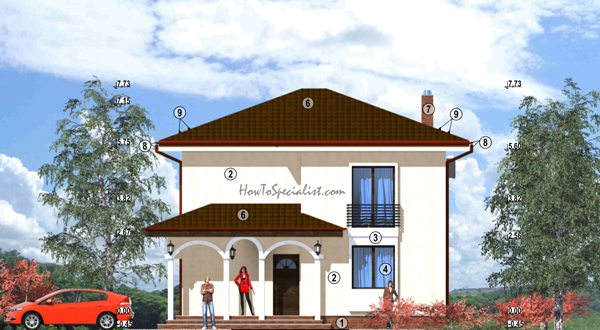
Plan-drawing-for-brick-house
Every house starts with a plan, so our countryside house didn’t make an exception. As you can see we went after a Mediterranean design with a few local influences so it blends in easily. This isn’t a large house because I wanted to go for minimalism and pack everything I needed in a medium sized area. The house features two floors and an attic that will be used for storage purposes. This is a concrete and brick house with 3 bedrooms, 2 bathrooms, a large kitchen, a living room and two small rooms for storage. In addition, the house features a porch to the front with beautiful columns and arches.
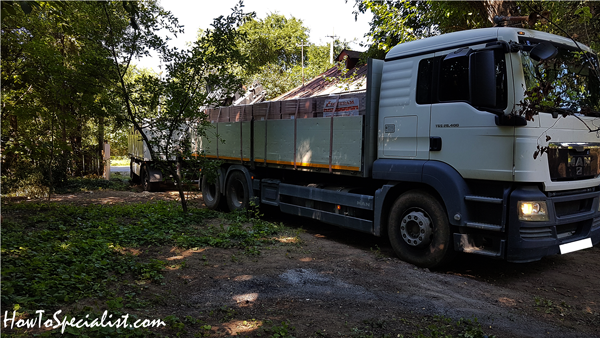
Unloading-bricks
We needed many bricks for the house, so the supplier delivered it with trucks. In total we had around 50 pallets of bricks.

Unloading-bricks-from-truck
Luckily the truck had a crane attached to the bed, making the unloading very easy. We staked all the pallets in the front yard making sure it won’t bother us when assembling the rebar beams and so on. However, you can also ask them to unload the bricks directly to the house floor.
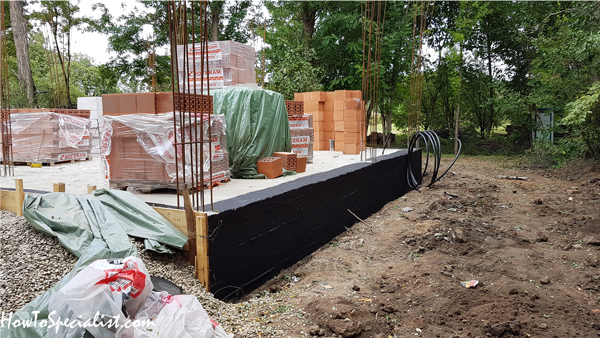
Columns-and-bricks-for-house-construction
However, you can also ask them to unload the bricks directly to the house floor. That makes it easy to start building the walls, as you have the bricks at an arm’s length. You should not overdo this, because the concrete slab cannot support the weight of too many brick pallets stacked one next to another. We also applied a sealer to the foundation to make sure it doesn’t get water infiltration on the long run. We are going to attach polystyrene sheets as well, but I will show that in a later Episode of the Concrete and Brick House Series.
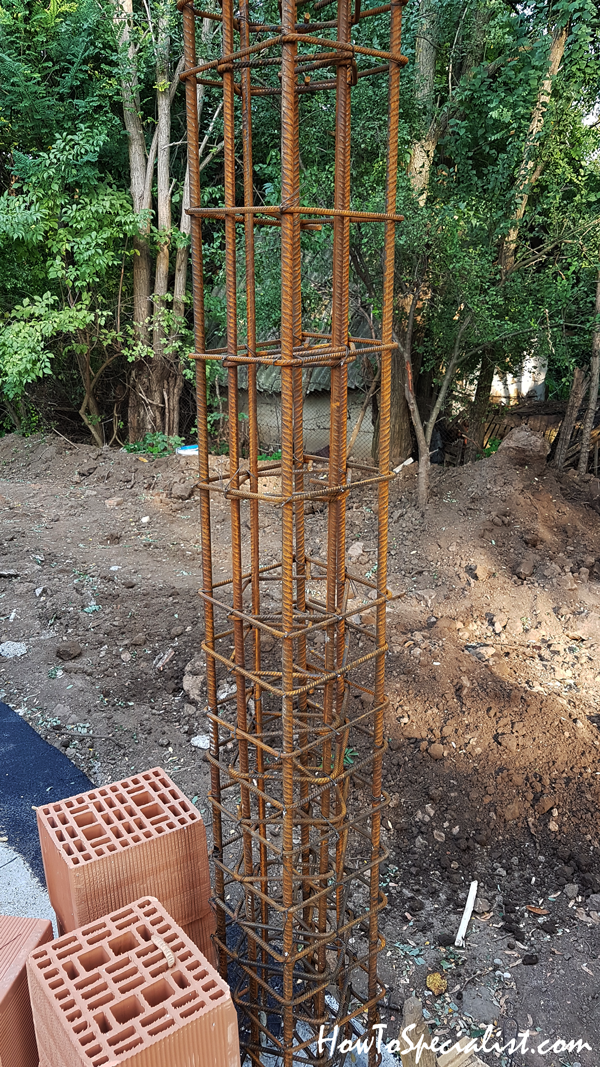
Column-rebars
We set the column rebars into place, following the plans. Lots of stirrups and the distance between them varries along the full length of the column.
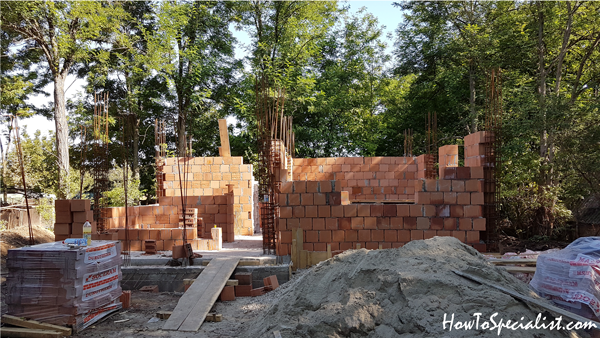
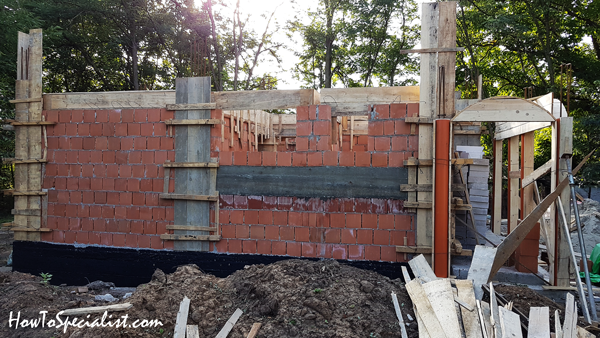
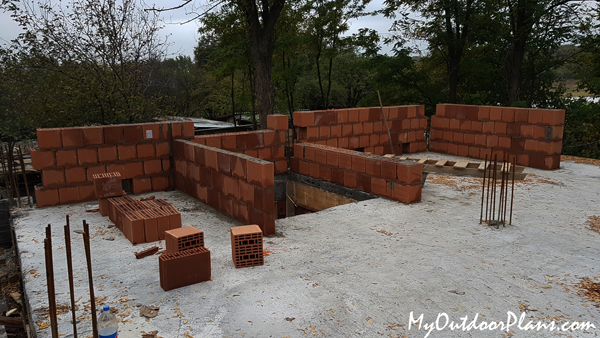
Building-brick-walls-for-house
We started laying the bricks to the concrete slab, starting first with the exterior walls and continuing then with the interior walls. The exterior walls are 12″ wide while the interior walls are 10″ and 6″ for the partitions. See a step by step tutorial on how to mix the mortar for the bricks HERE.
I will share a quick tip when building brick walls. You need to use string on the outside of the brick layers and set one brick at each end and then fill the rest of the layer. In addition, use a spirit level to the outside of the brick wall only. Do not use the spirit level both on the interior and exterior faces of the wall. Follow the architectural plans so you can create the door and window openings.
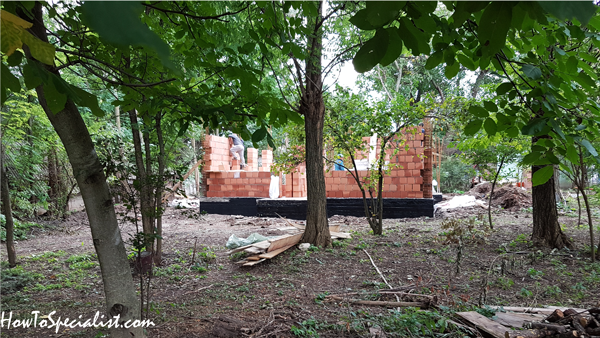
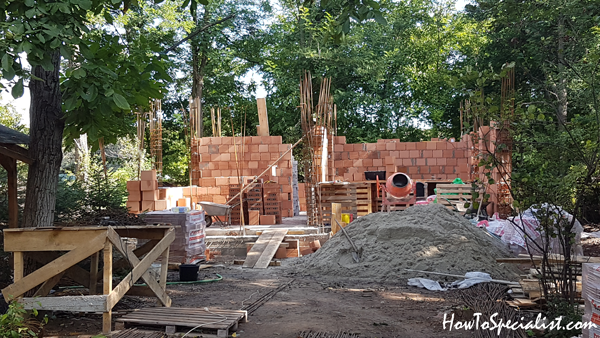
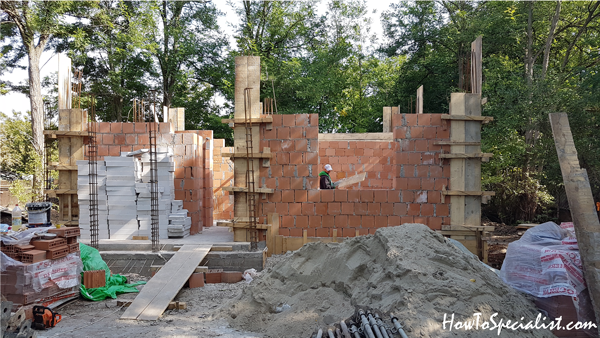
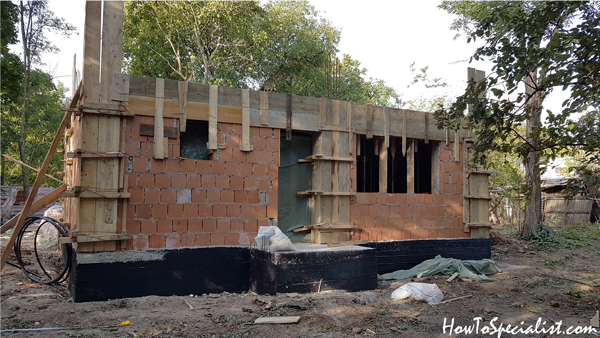
Building-a-brick-house—first-floor
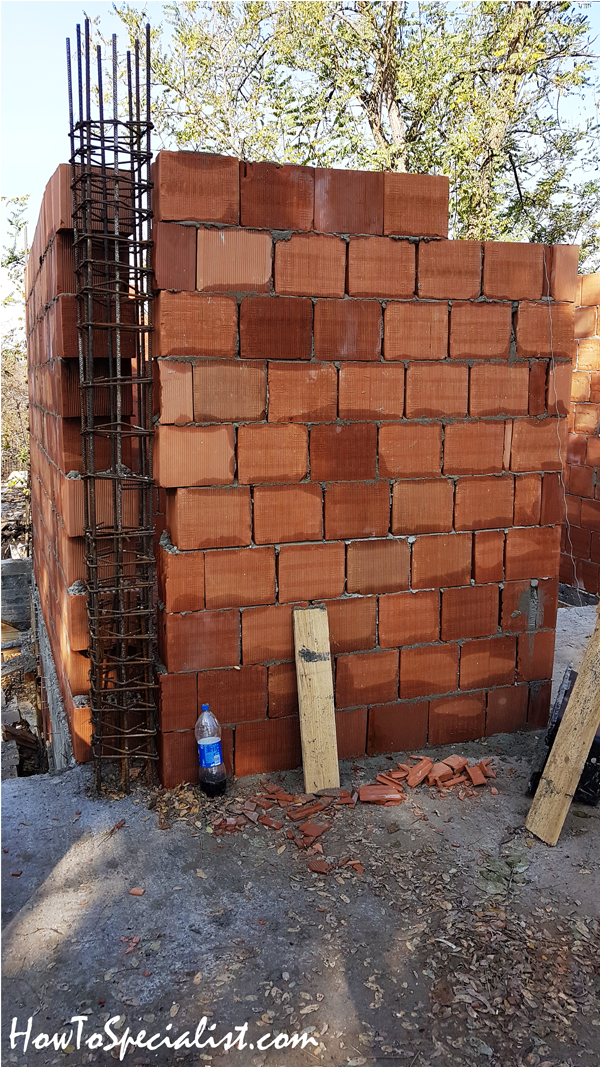
Brick-house-walls—first-floor
You should know that building the brick walls is basically the fastest step of the whole construction process. In less than a week the brickwork for the first floor was completed. If you wanna check if the worker are doing a good job you need to look at several aspects. First of all, check if there are gaps between the bricks. If you can see through the wall, they are doing a poor job. Secondly, you need to make sure the mortar layers is consistent and about 1/2″ on all sides.
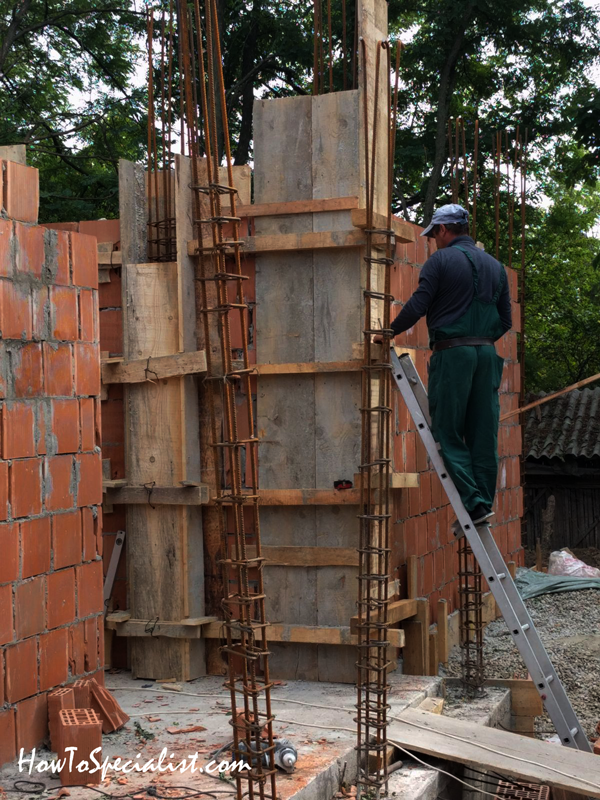
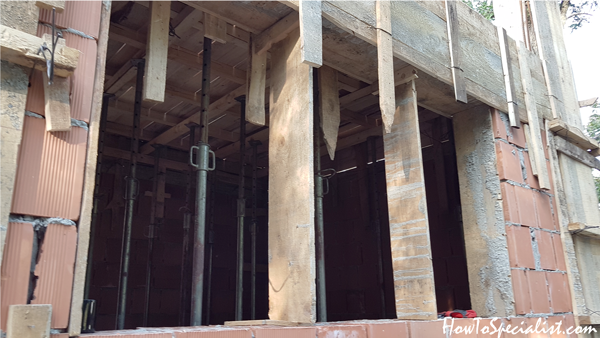
Closing-the-formwork-on-columns
After finishing the brickwork, we installed the form panels around the columns. Use a spirit level to make sure they are plumb and tighten them together with 4 mm wire.
Forming-the-columns-for-the-house
We added the forms to the other columns.
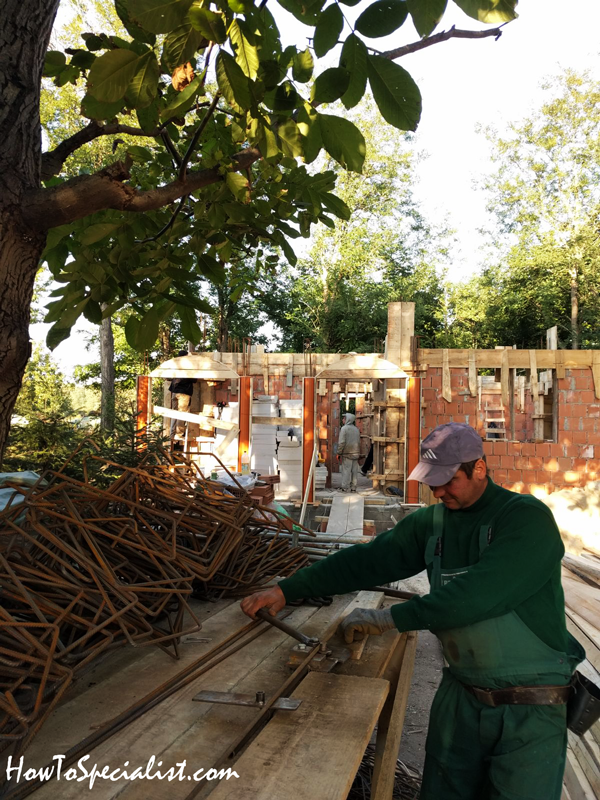
By the way, we did all the stirrups for the house by hand, using a bender and a workbench. You can buy the stirrups already made but out team preferred to bend them on the construction site. It took a couple of days for one guy to make all the stirrups for the first floor of the house.
How to Build Concrete Ceilings
Formwork-for-first-floor—brick-house
Next, we’re building the formwork for the ceiling and for the porch arches. For the concrete columns we’re using PVC pipes because they are perfect as formwork.
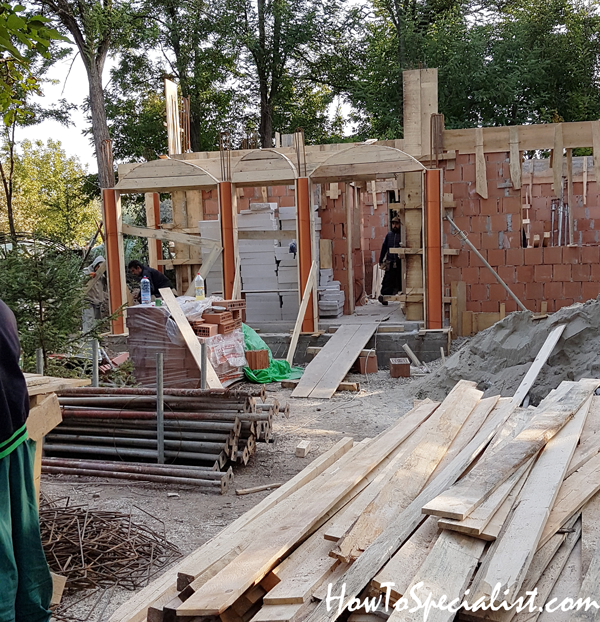
Formwork-for-concrete-arches
Building the arches need experience and a good understanding of the plans, to get the exact radius. Notice the vertical slats besides the PVC pipes that support the arches.
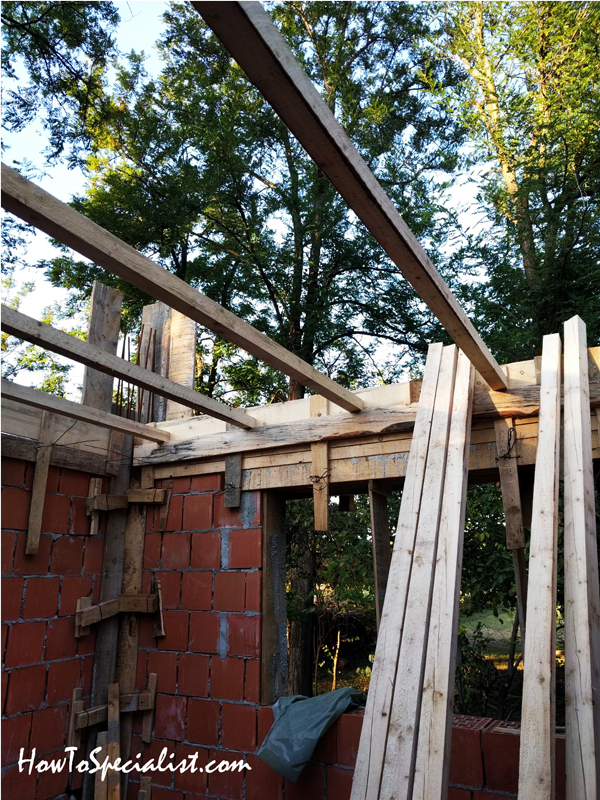
Framing-the-concrete-ceiling-formwork
We used 4×4 beams for the ceiling frame. A laser level was used to mark a reference line on the walls and then we set the frame of the formwork.

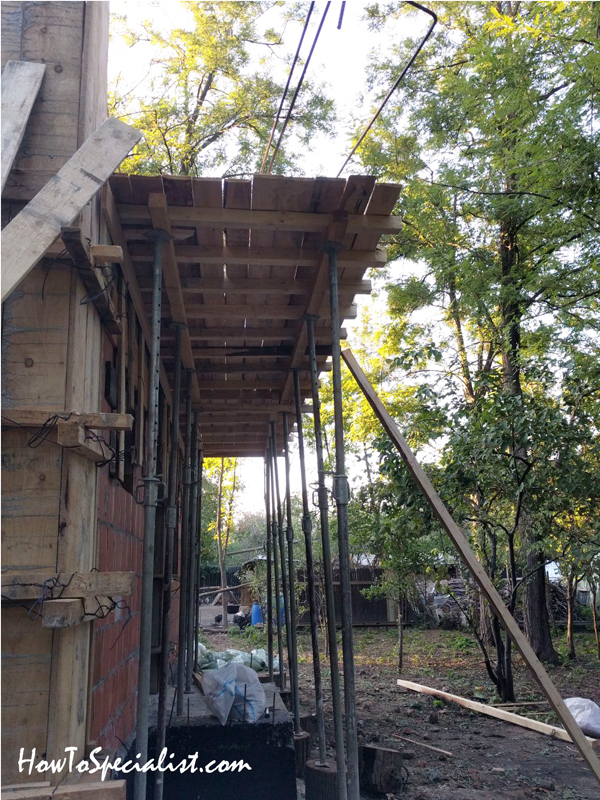
Shoring-posts-for-concrete-ceiling-frame
We added the shoring props before adding the slats to the formwork, so we had a sturdy support when driving in the nails and such. We rented about 150 shoring props for the house.
Formwork-for-columns-and-ceiling—brick-house
Framing-concrete-balcony
We have a small balcony to the back of the house. The balcony needs an equally sturdy formwork, because it has no support other than the shoring posts.
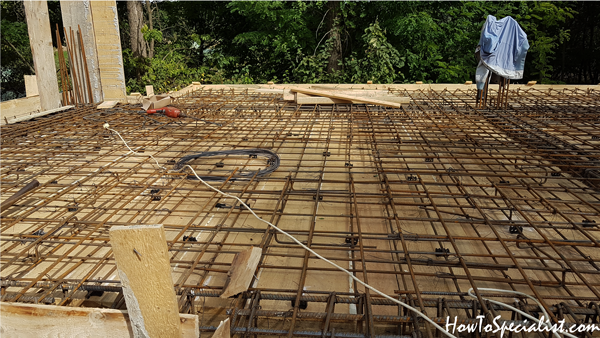
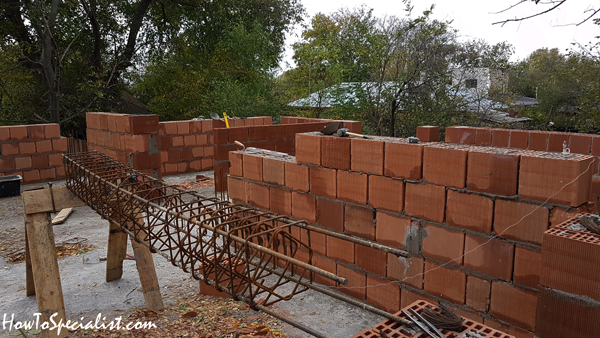
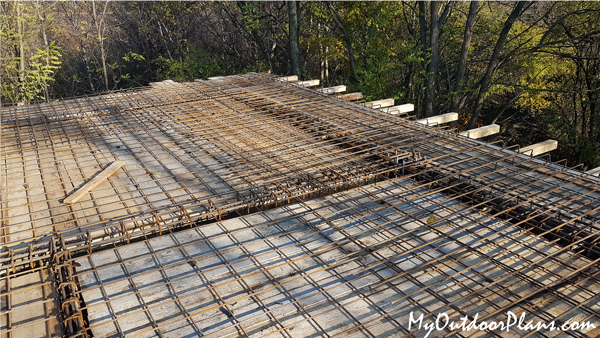
Concrete-ceiling-reinforcement-bars
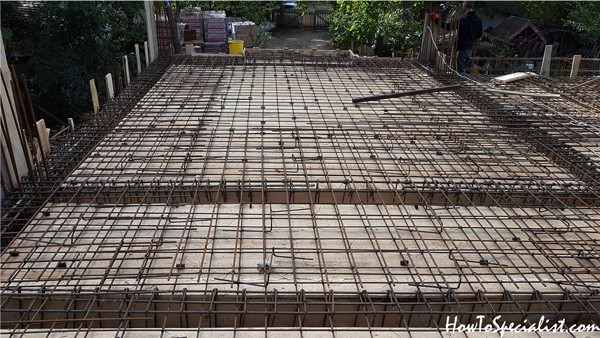
Now, it is time to add the rebar beams above the walls and then start laying the rebars for the concrete ceiling. You should notice we have used spacers under the rebars to keep a 1″ gaps between the formwork and rebars. You want the rebars to run through the middle of the concrete ceiling (5″ thick) so it can reinforce it properly. You don’t want any rebars exposed on either side.
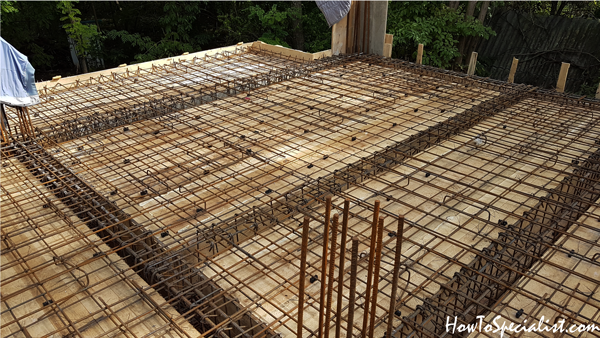
Concrete-ceiling-rebars
Notice the columns that pierce the ceiling through and run 4 ft or so above it. We need those so we can join the columns for the second floor.
Formwork-the-concrete-ceiling
Formwork-for-concrete-ceiling
Reinforceing-bars-for-concrete-ceiling
Everything is set in place according to the structural plans and we also got the OK from the engineer to pour the concrete over the ceiling formwork.
How to Build Interior Concrete stairs
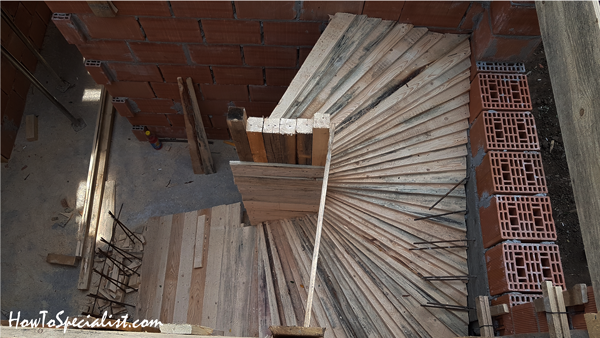
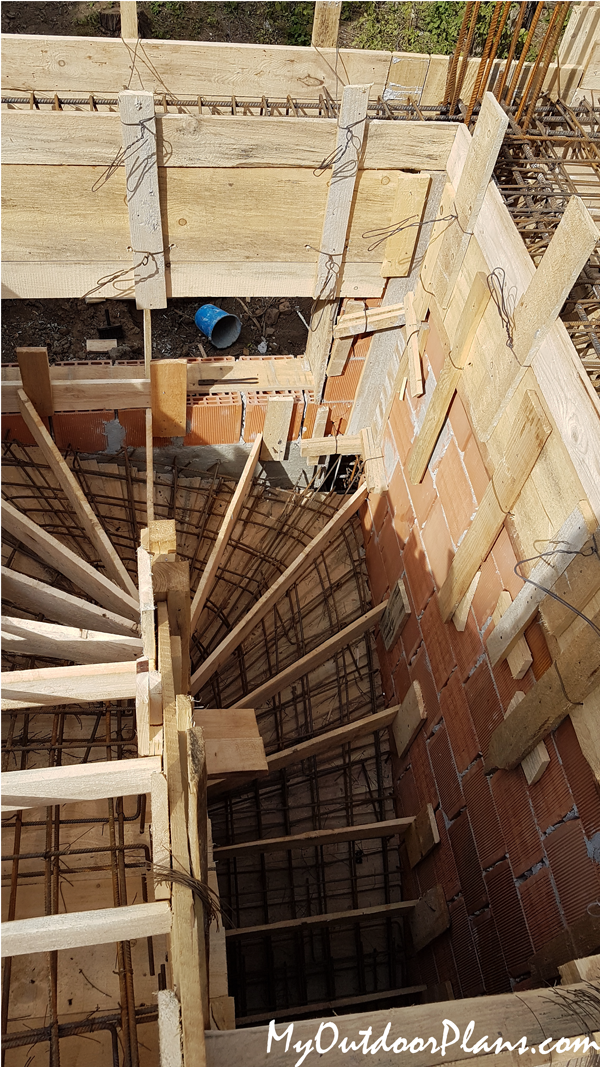
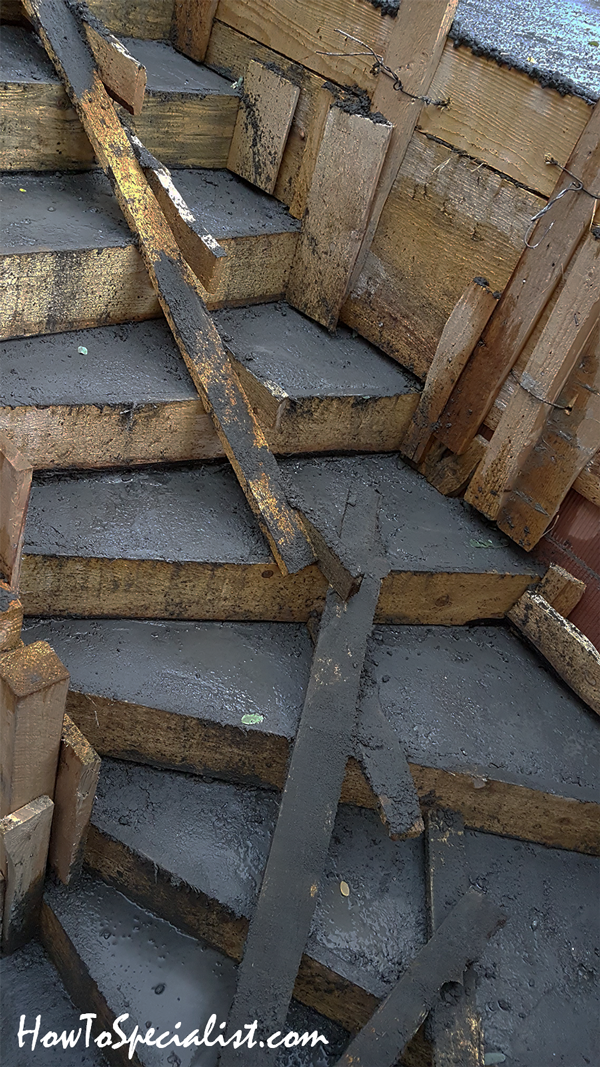
Formwork-for-concrete-stairs
Till then we need to frame the interior concrete stairs. As you can see the U shaped stairs turn so making the formwork was a bit challenging. Luckily we had the right people for the job who were patient enough to make hundred cuts for the slats that are stacked one on top of another to create the turn.
Building-a-wooden-form-for-concrete-stairs
Now that the formwork for the stairs is done, it is time to add the rebars.
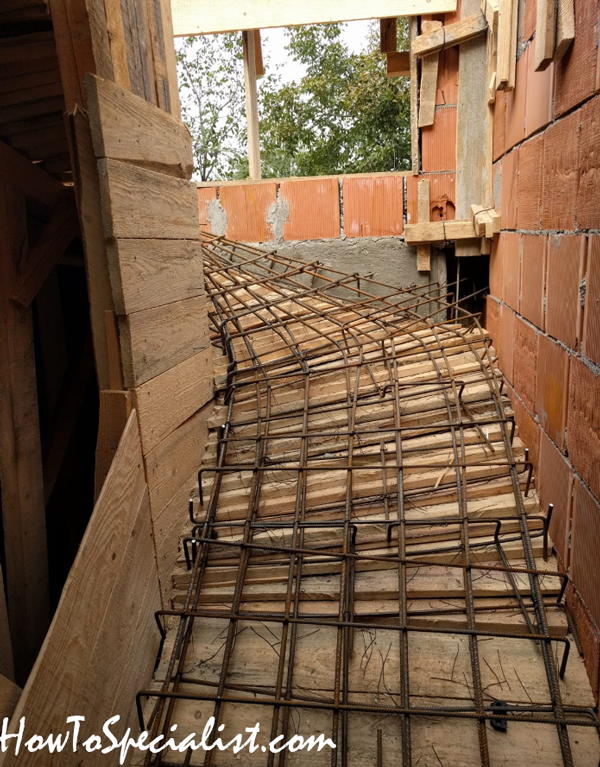
Concrete-stairs-rebars
You need two layers of rebars for the concrete stairs. The interior stairs will be suspended in the air, so it takes a proper reinforcement structure to support the weight of the concrete. Leave the formwork into place for one month, to give concrete enough time to dry out.
Rebars-for-concrete-stairs
Rebar-structure
And even more rebars. We also attached the slats for the ladder steps. I really love this stair and I think it’s my favorite part of the house.
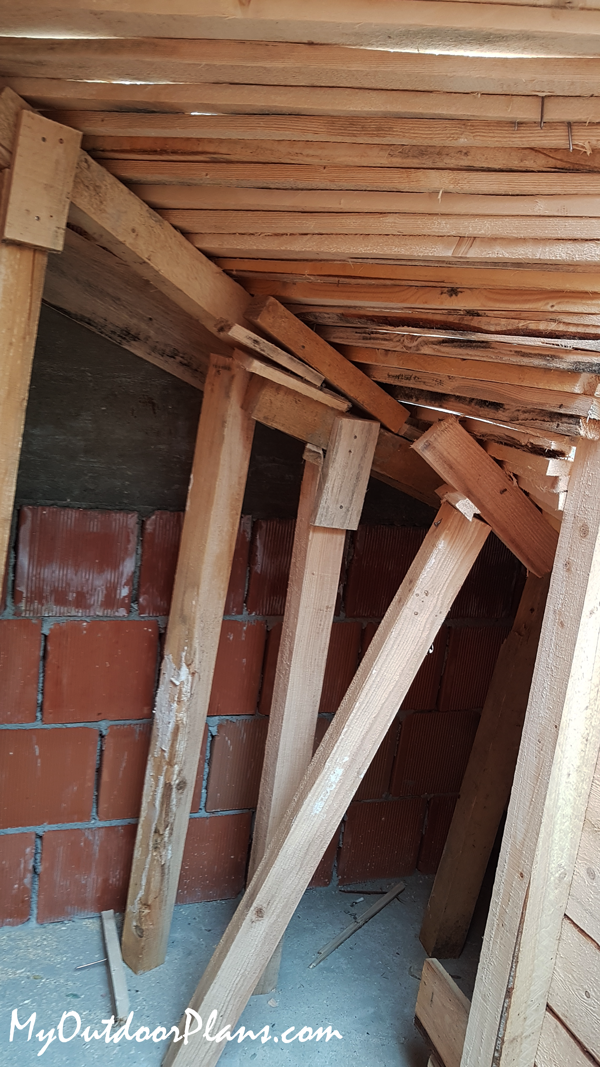
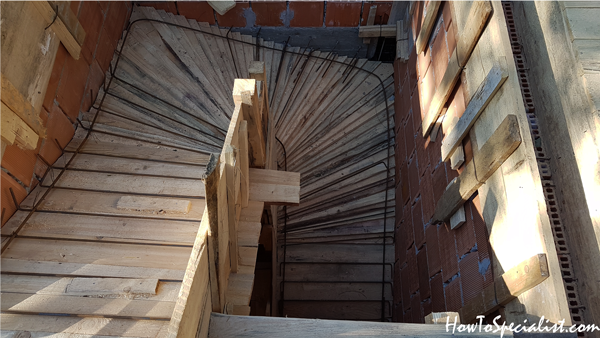
Supports-for-stairs-formwork
You should notice the underneath supports for the stair formwork. We are going to pour concrete to the form so it will get really heave, thus it need a super sturdy structure.
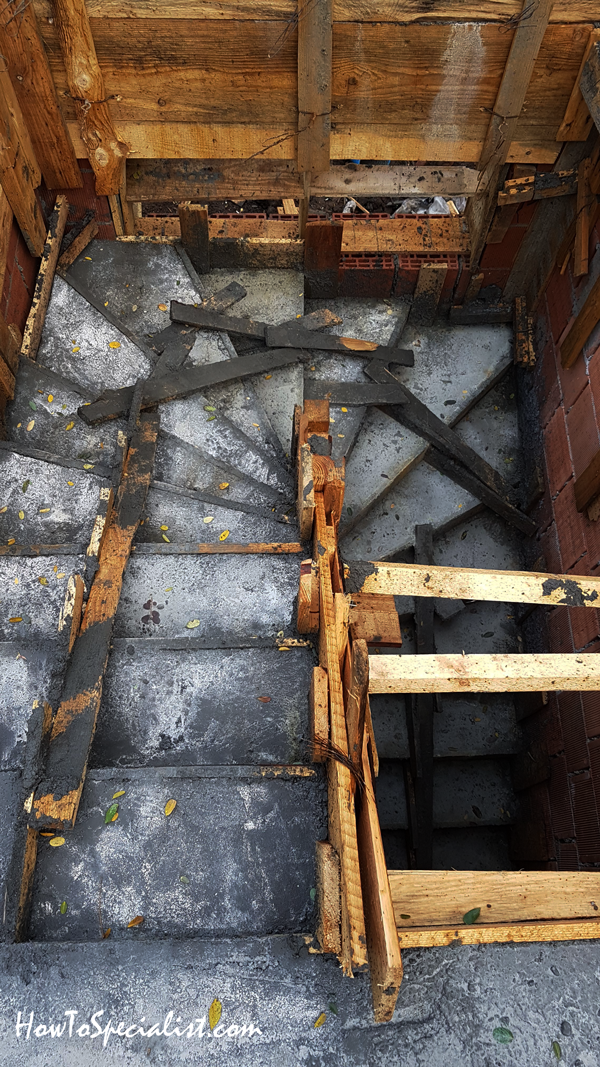
Easy Concrete-stairs
We poured the concrete stairs and let them about one week until we removed the step formwork slats. Remember that you need to leave formwork underneath the stairs for one month straight! In addition, sprinkle the concrete daily so you don’t get cracks.
Concrete-stairs
How to Pour Concrete Ceilings
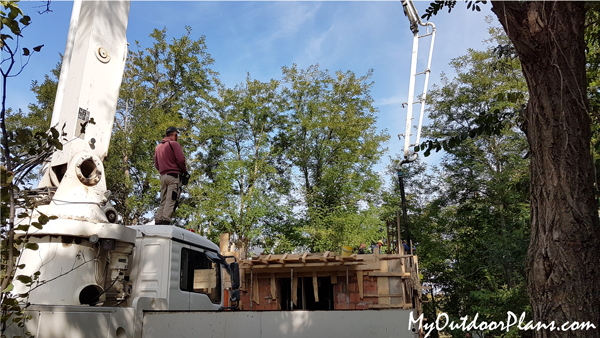
Pouring-a-concrete-ceiling-with-pump-truck
We poured the concrete ceiling at the same time with the stairs. We also got all the concrete already mixed and we also rented a pump truck to get it there. The truck driver was definitely enjoying what he’s doing.
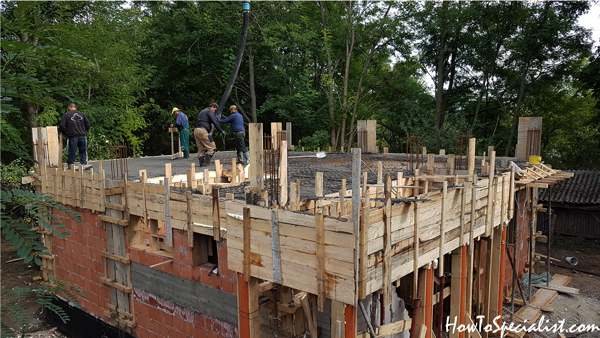
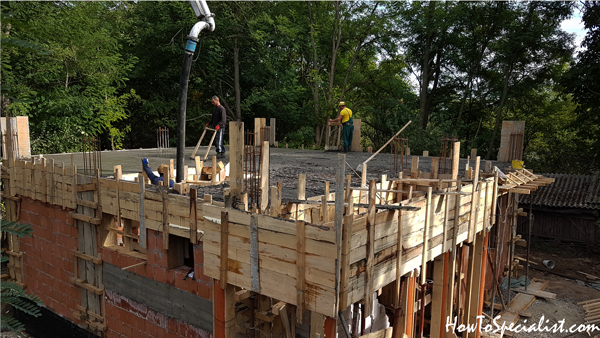
Pouring-concrete-ceiling
The guys were busy both spreading the concrete evenly and then leveling it out with a diy trowel. We don’t need to have the ceiling surface perfect, because we’re gonna pour screed eventually. However, we wanted it consistent so we don’t have big differences in thickness between the different areas.
Leveling-the-concrete-ceiling
However, we wanted it consistent so we don’t have big differences in thickness between the different areas. You need to leave the shoring props in place for about one month. That’s longenough for the concrete to set and so it can support itself without the formwork.
How to build the second floor of the brick house
Brick-walls-for-second-floor
After one week we started building the second floor. Same bricks, same techniques.
Laying-the-brick-walls-for-the-house
After laying 4-5 brick layers we assembled the columns and then set them into place.
Brick-walls—second-floor
Notice the junction between the column rebars that start from the foundation and pierce through the ceiling, and the columns for the send floor.

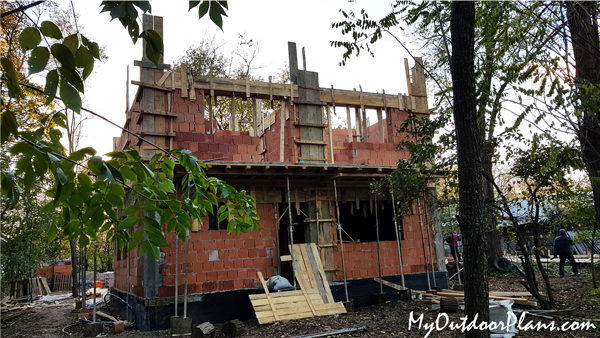
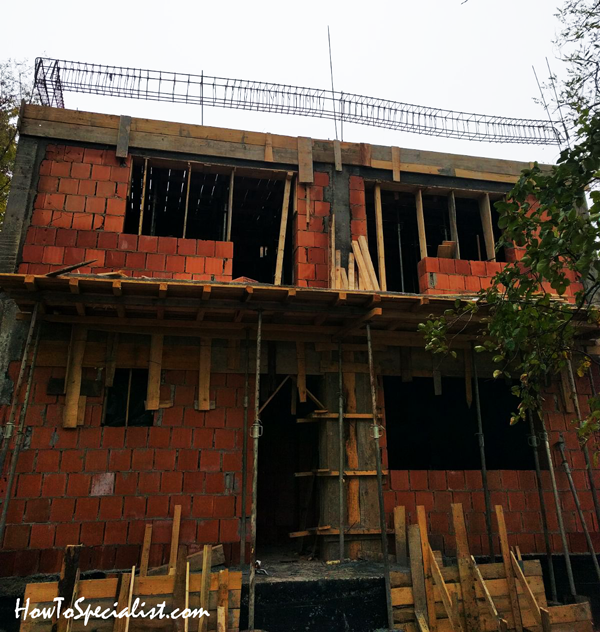
Building-brick-house—second-floor
After one more day, the second floor of the house is starting the take shape. We also took of the formwork from the front porch arches. Love that and I bet it’s gonna be the highlight of the house.

Building-second-floor-walls
Notice that we have large openings for windows.
Building-the-second-floor-for-the-brick-house
After all the brickwork was completed, we installed the formwork for the columns.We also framed the rebar beams that go on top of the walls.
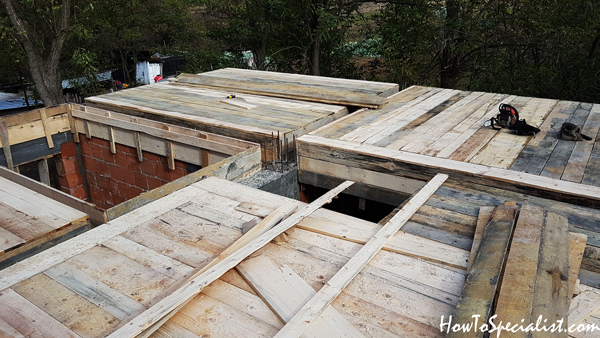
Formwork-for-the-concrete-ceiling
This the formwork for the second concrete ceiling. As you can see the formwork is built on top of each room, because on top of the brick walls we’re going to make rebar beams.
Top-beams-for-brick-walls
The brick walls must have a rebar beam on top of them that will lock them together tightly. We will pour the beams at once with the concrete ceilings. These beams are very heavy because the weight adds up, so the only solution is to assemble them on place. The beams need to sit on top of the columns, so every structural element comes together tightly.
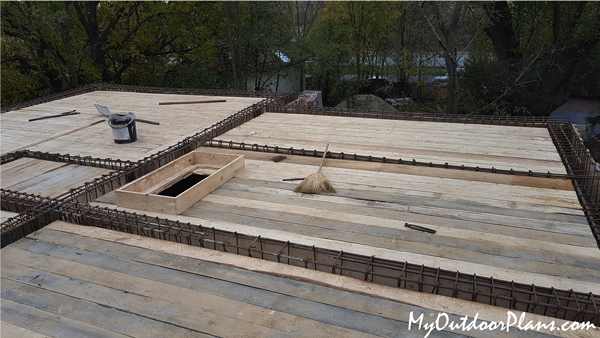
Second-concrete-ceiling-formwork
It is important to clean all the debris and sawdust before setting the rebar net for the concrete ceiling. We also used a pressure washer to clean the top of the brick walls (lots of leaves and other pieces of wood).
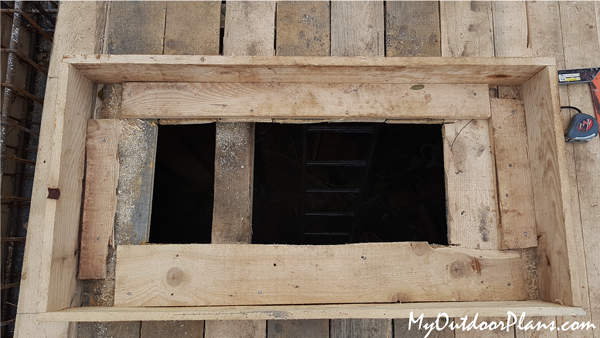
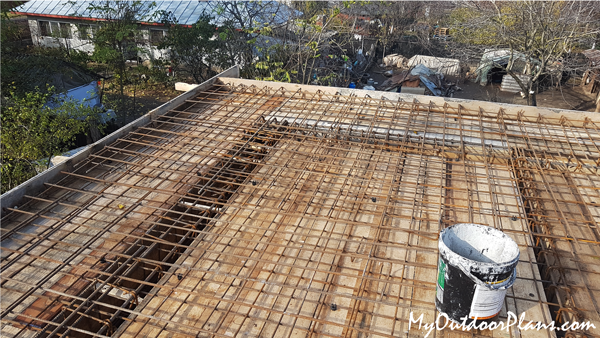
Framing-the-access-opening-for-the-attic
We also framed a hole in the ceiling for the attic ladder. We measured the diagonals and used a carpentry square to make sure the corners are right angled.
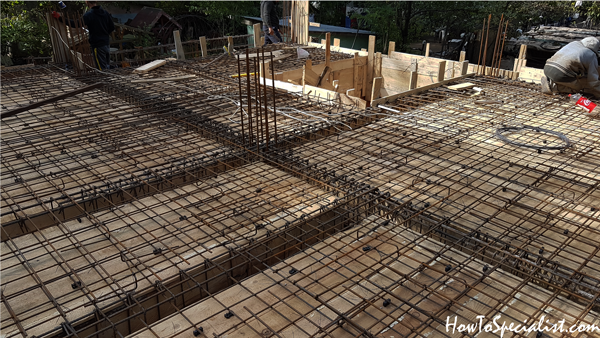
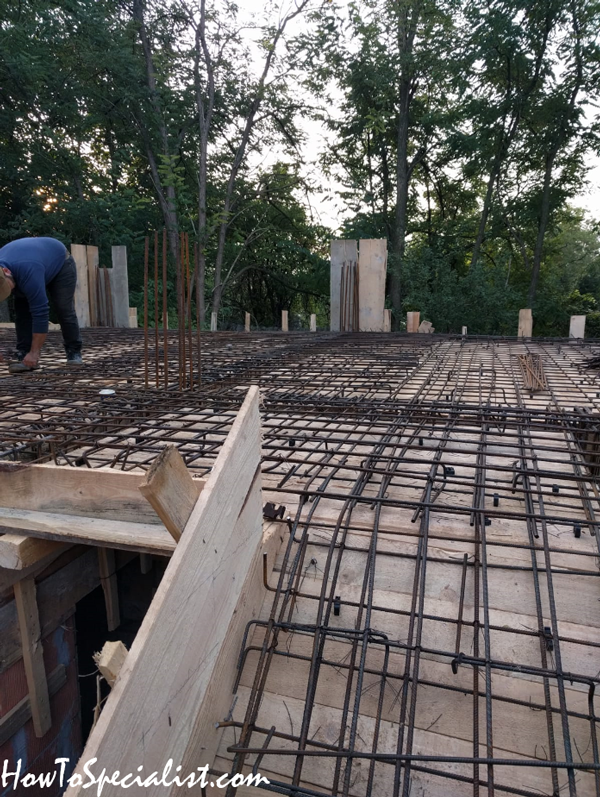
Reinforcement-bars-for-second-ceiling
Next, time for the rebars net. We followed the plans so I won’t take your time explaining what’s going on there, because the structure is unique for each house, according to the soil type, number of floors and materials used.
Rebars-for-second-concrete-ceiling
You should notice the concrete ceiling goes about 3′ outside of the walls.

Pour-the-second-ceiling-for-brick-house
Notice the shoring props that are around the house to support the ceiling that goes outside the walls. After we got the OK from the engineer we poured the concrete ceiling. We got the concrete from the same guys we worked with before, because we were very pleased with the price and quality.
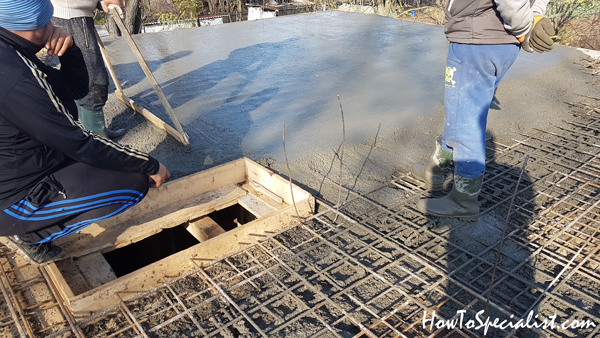
Pouring-second-floor-ceiling
Notice that pouring a concrete ceiling is a messy job. All the guys had rubber boots. also, notice the DIY trowel that was used to smooth the top surface.
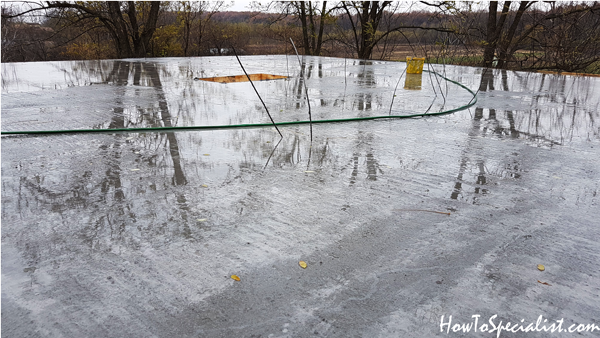
Concrete-ceiling
It is important to leave the concrete for at least 1 week before you start building the gable roof structure. This way, the concrete will have enough time to set and you can then add weight on the slab without having cracks. In addition, I recommend you to water the slab every day with a garden hose. Especially if it’s sunny, the concrete will drill out too quickly and that will lead to cracks into the slab. Or you can be lucky as we were and the rain did all the job for us :)
Make sure you take a look over the rest of the Concrete and Brick House Series to see our building adventure from bare ground to moving in. I promise you will have a lot of fun seeing the house coming together and maybe learn from out mistakes and problem solving.
Thank you for reading our article on how to build a brick house foundation and we recommend you to check out the other episodes of the series. Don’t forget to share our articles with your friends, by using the social media widgets.